How to Create Vector Textures from Photos: Grunge, Fabric, and More
Transform photographs of textures into scalable vector graphics. Perfect for adding depth to designs without resolution limitations.

Graphics & Design Experts
Our team of experienced designers and developers specializes in vector graphics, image conversion, and digital design optimization. With over 10 years of combined experience in graphic design and web development.
Key Takeaways
- High-contrast photographs produce the cleanest vector textures — push blacks and whites before tracing
- Six essential texture families: grunge, halftone, watercolor, fabric, wood, and stone each serve distinct purposes
-
SVG filters like
feTurbulencegenerate procedural textures without any raster source - Vector textures scale infinitely for t-shirts, posters, packaging, and web
- Build a personal texture library over time — photograph surfaces everywhere you go
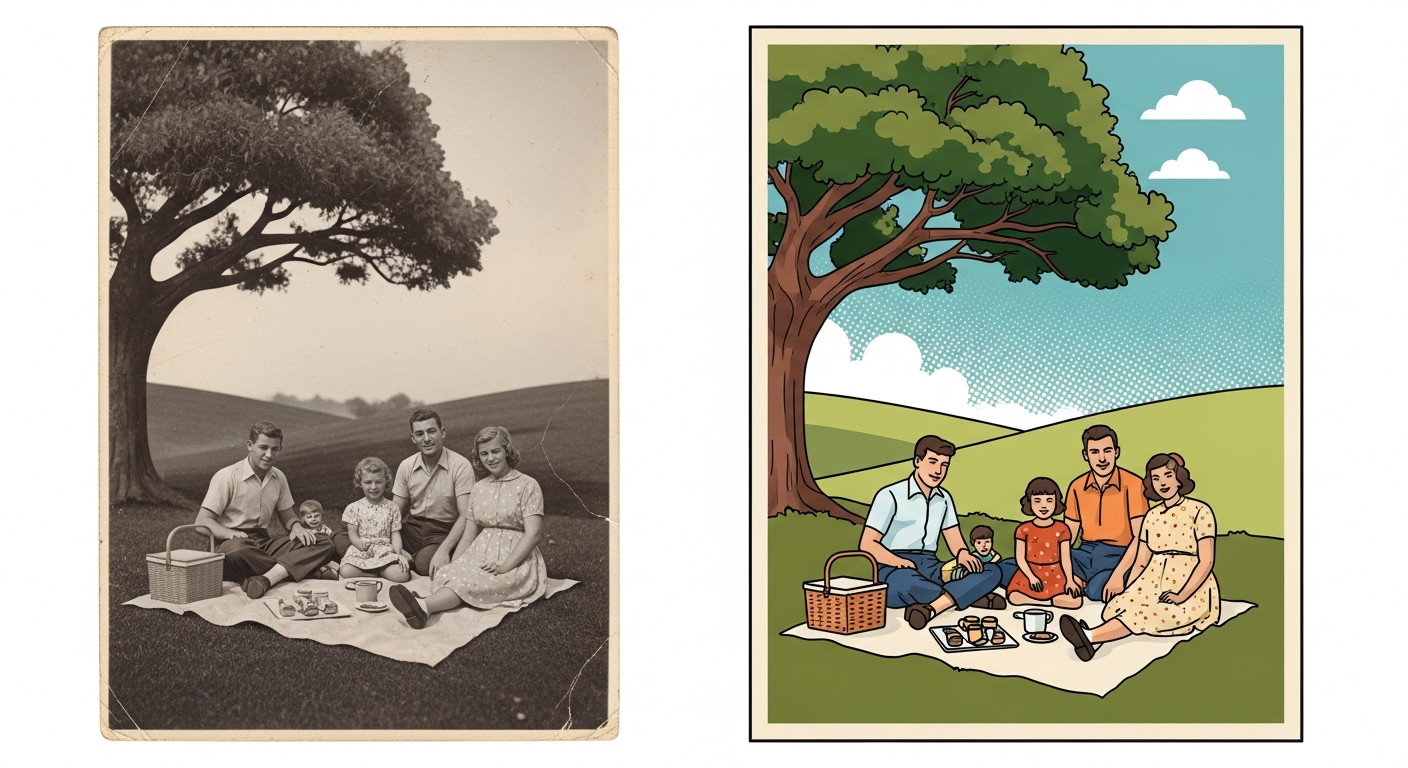
Vector artwork is powerful, but let's be honest: sometimes it feels sterile. Perfectly smooth curves and precise gradients can look too clean for certain projects. That's where vector textures change everything — injecting character, warmth, and tactile quality into scalable artwork.
As someone who bounces daily between Procreate sketches and Illustrator production files, learning to create vector textures from photographs was the single biggest upgrade to my illustration workflow. Let me walk you through everything I've learned.
What Are Vector Textures?
Vector textures are path-based representations of surface qualities — grunge, grain, weave, woodgrain, stone — that remain infinitely scalable because they're built from mathematical curves, not pixels. Unlike embedding a JPEG texture as a clipping mask, true vector textures live as editable SVG paths you can recolor, scale, and manipulate freely. Upload a photo texture to VectoSolve and you get clean, traced paths ready for any scale.
> "Texture is the soul of illustration. Without it, vectors are just geometry homework." — Von Glitschka
---
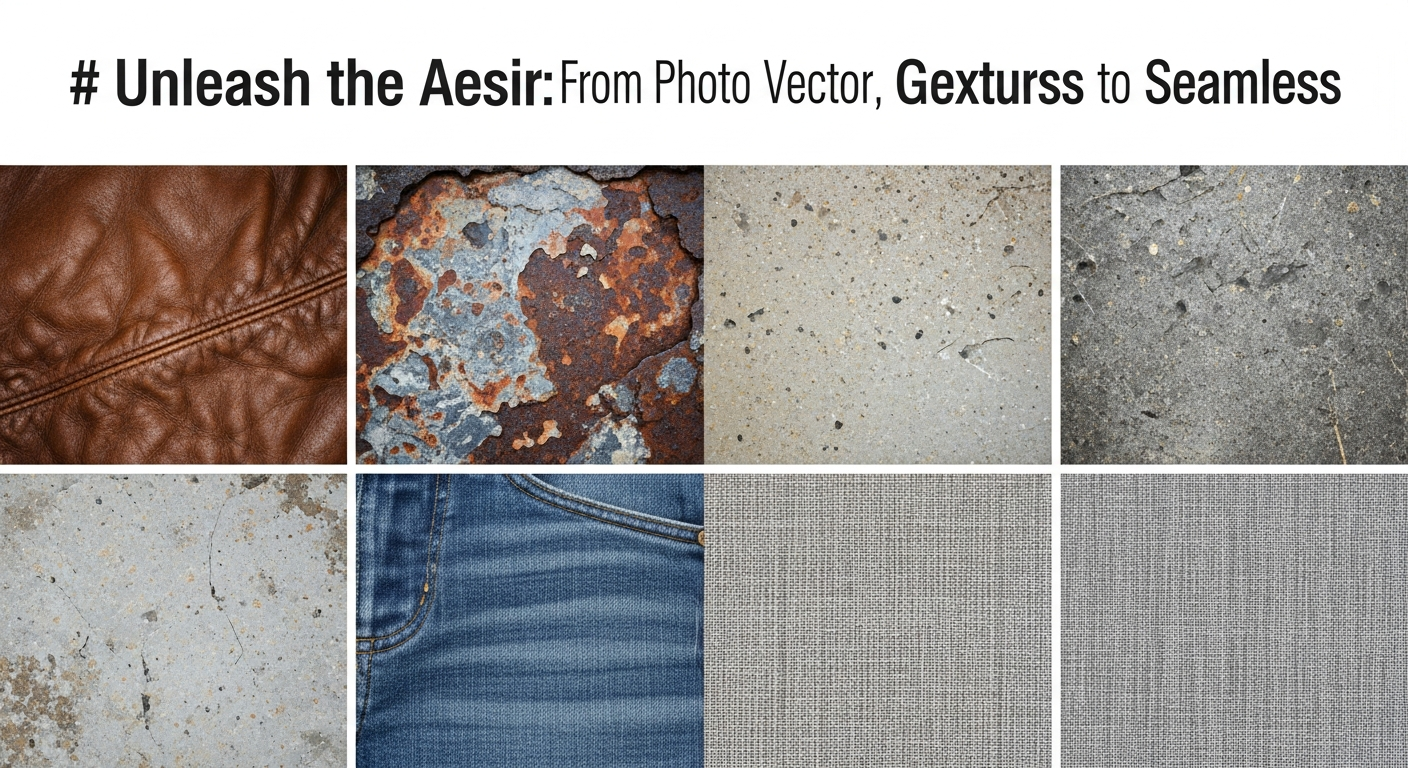
The Six Essential Texture Families
| Texture Type | Visual Character | Best Use Cases | Complexity | |-------------|-----------------|----------------|------------| | Grunge | Worn, distressed, raw | Punk posters, vintage logos, streetwear | Medium | | Halftone | Dotted, retro print | Comic art, pop art, retro ads | Low | | Watercolor | Soft bleeds, pooling | Editorial, wedding, botanical art | High | | Fabric | Woven, knit, canvas | Fashion, packaging, textile mockups | Medium | | Wood | Ring patterns, grain | Craft branding, rustic signage | High | | Stone | Pitted, cracked, veined | Architecture, luxury branding, games | High |
Grunge is the workhorse — photograph concrete, rust, peeling paint, or crumpled paper. Halftone evokes golden-age print; shoot old newspapers or vintage comics. Watercolor is the hardest to vectorize well but the most rewarding — paint actual washes on thick paper, photograph them, then trace. Fabric textures (burlap, denim, linen) are essential for fashion and packaging. Wood grain vectors are surprisingly popular for craft beer labels and rustic branding. Stone textures convey permanence and luxury, vectorizing best when you isolate vein or crack patterns against clean backgrounds.
---
Photographing Textures for Vectorization
Post-processing before vectorization: Desaturate fully, push contrast aggressively with Curves, crush blacks and blow whites with Levels, crop tightly to remove non-texture areas, and apply a slight sharpen to define edges the tracer will follow.
---
Step-by-Step Vectorization Workflow
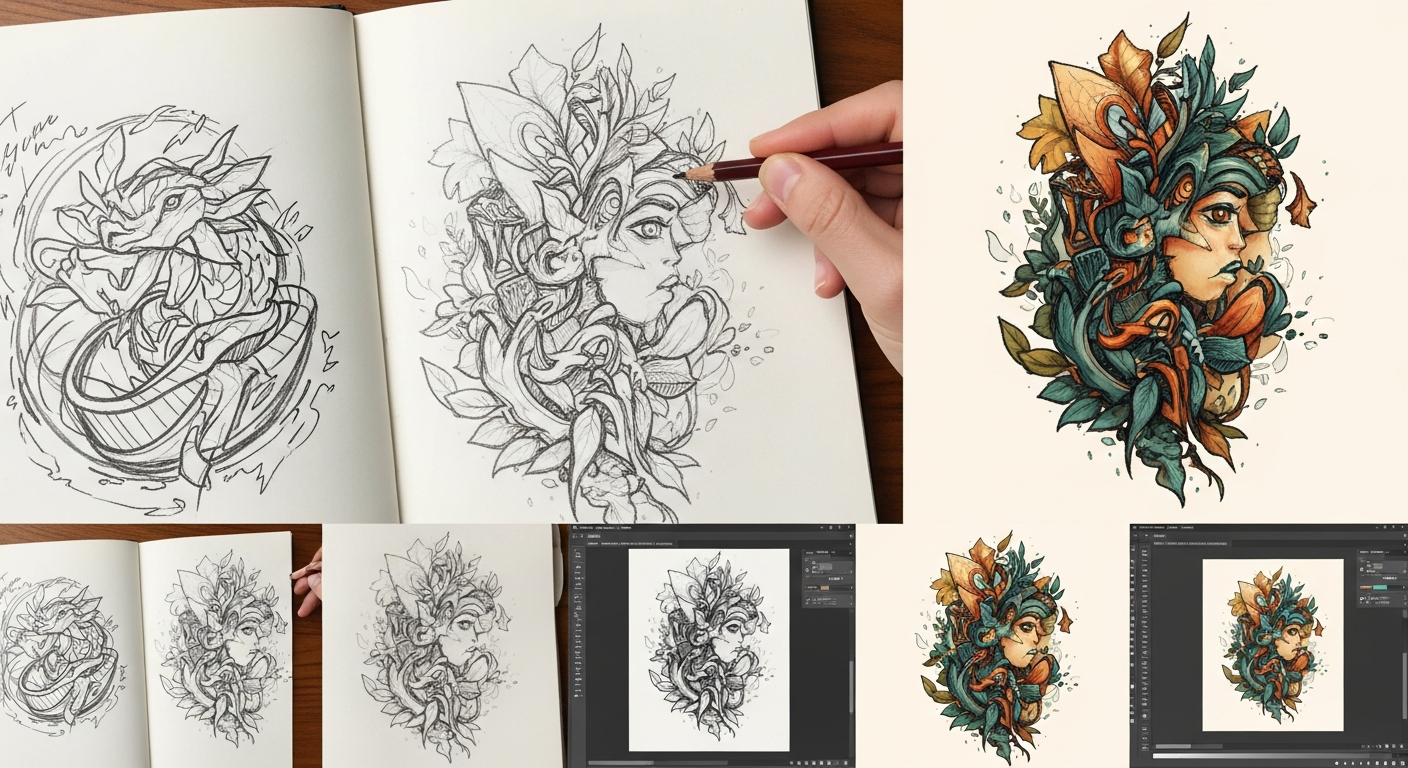
Step 1: Capture and Select
Photograph your texture source using the tips above. Review your shots and pick the one with the best contrast and most interesting pattern distribution.Step 2: High-Contrast Preparation
Desaturate → 100%
Contrast  → +60 to +80
Levels    → Black: 30-50 | White: 200-220
Sharpen   → Unsharp Mask 50%, radius 1.5px
Step 3: AI-Powered Vectorization
Upload your prepared image to VectoSolve. The AI tracer analyzes texture patterns and generates optimized SVG paths. Use higher detail settings for textures — you want to preserve the organic irregularities that give the texture its character.Step 4: Refine in the SVG Editor
Open your result in the VectoSolve SVG Editor to clean up:Step 5: Create Density Variations
From your base texture, create three versions: Heavy (full density for dominant areas), Medium (50-60% paths removed for supporting texture), and Light (sparse version for subtle background grain).---
SVG Filter Effects for Procedural Textures
Sometimes you don't need a photograph at all. SVG's built-in filter primitives can generate textures procedurally using code — incredibly powerful for web designs.
Change baseFrequency to control grain size (higher = finer) and numOctaves for complexity. Pair with feDisplacementMap to warp vector shapes organically:
This creates a vintage print effect that's resolution-independent and weighs almost nothing compared to raster textures.
---
Real-World Applications
T-Shirts and Apparel
Distressed vector textures on type and graphics communicate that coveted vintage aesthetic. Since screen printing requires vector separations anyway, textured vectors fit the production pipeline perfectly.Posters and Print Design
Concert posters, movie posters, editorial layouts — texture transforms flat vector illustration into something that feels hand-crafted. Layer subtle paper grain across your entire composition, then add heavier grunge to focal areas.Packaging Design
Craft brands benefit enormously from vector textures. A kraft paper texture on a beer label or coffee bag communicates artisanal quality, and because the textures are vectors they scale perfectly from sample labels to production runs at any size.Web and Digital Design
Use SVG textures as CSS backgrounds, hero section overlays, or animated elements. ThefeTurbulence approach is especially powerful here — zero additional HTTP requests and the texture renders perfectly on Retina displays.---
---
| Texture Type | Source Photo Tip | Trace Method | Typical Path Count |
|---|---|---|---|
| Grunge / distressed | High-contrast concrete, rust, peeling paint | Threshold + auto-trace | 500–3,000 |
| Halftone dots | Printed newspaper close-up | Bitmap mode + trace | 200–1,500 |
| Watercolor wash | Wet paint on cold-press paper | Multi-color trace (8–16 colors) | 1,000–5,000 |
| Fabric weave | Macro lens on linen or canvas | Line art trace + pattern tile | 300–2,000 |
| Wood grain | Sanded plank, side-lit for contrast | Grayscale trace (6–8 shades) | 800–4,000 |