How to Digitize Hand-Drawn Sketches to Vector (Complete 2026 Guide)
Complete guide to digitizing hand-drawn sketches into clean vector files. Learn scanning techniques, AI-powered vectorization, and pro tips for preserving your art style.
UX Designer & Content Strategist
Sarah brings 6 years of design experience from agencies like IDEO and Frog Design. She specializes in visual design systems and brand optimization.
In 2026, hand-drawn design is experiencing a renaissance. While AI-generated imagery floods the internet, brands are turning to authentic, imperfect hand-drawn elements to stand out. From Spotify's playlist covers to indie packaging design, naive art and handmade aesthetics are dominating visual culture.
This guide will walk you through every step of digitizing hand-drawn sketches into clean, editable vector files — from choosing the right paper to AI-powered conversion and final refinement.
Why Vector Format Matters for Hand-Drawn Art
Vector files (SVG, AI, EPS) are resolution-independent. Unlike raster images that pixelate when scaled, vectors maintain crisp edges at any size — essential for:
Equipment Checklist
Drawing Materials
For line art: Black fine-liner pens (0.3mm-0.8mm) like Micron or Staedtler on smooth white paper (bristol board or marker paper)
For pencil/charcoal: 2B-6B pencils for darker, scannable lines with fixative spray
For watercolor/ink wash: High-contrast pigment on heavyweight paper (300gsm)
Scanning Equipment
| Equipment Type | Best For | Price Range | Quality | |---------------|----------|-------------|---------| | Flatbed Scanner | Line art, small-medium originals | $80-$500 | Excellent | | Smartphone Camera | Quick digitization, large artwork | $0 (built-in) | Good | | Overhead Scanner | Books, thick materials, fragile art | $300-$2000 | Excellent | | DSLR/Mirrorless | Professional reproduction, large scale | $600+ | Excellent |
Scanning Settings Guide
| Use Case | DPI | Color Mode | File Format | File Size (est.) | |----------|-----|------------|-------------|------------------| | Web icons/UI | 300 | Grayscale or RGB | PNG | 1-3 MB | | Print (business cards) | 600 | Grayscale or RGB | PNG or TIFF | 5-15 MB | | Large format print | 600-1200 | RGB | TIFF | 20-100 MB | | Archival/professional | 1200+ | RGB | TIFF (uncompressed) | 100+ MB | | Quick vectorization test | 300 | Grayscale | JPG (high quality) | 1-2 MB |
Ready to convert your images?
Try VectoSolve FreeStep-by-Step Tutorial: Sketch to Vector
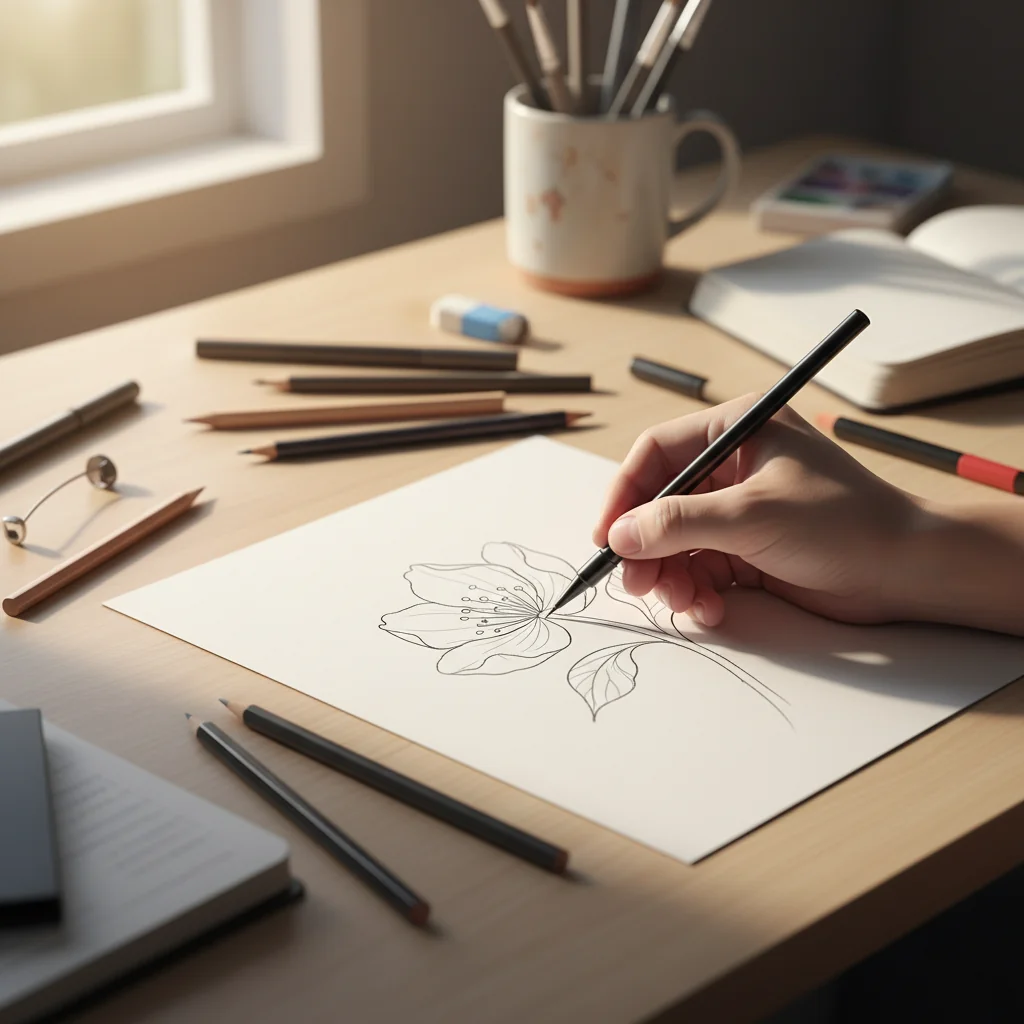
Step 1: Drawing Techniques for Clean Vectorization
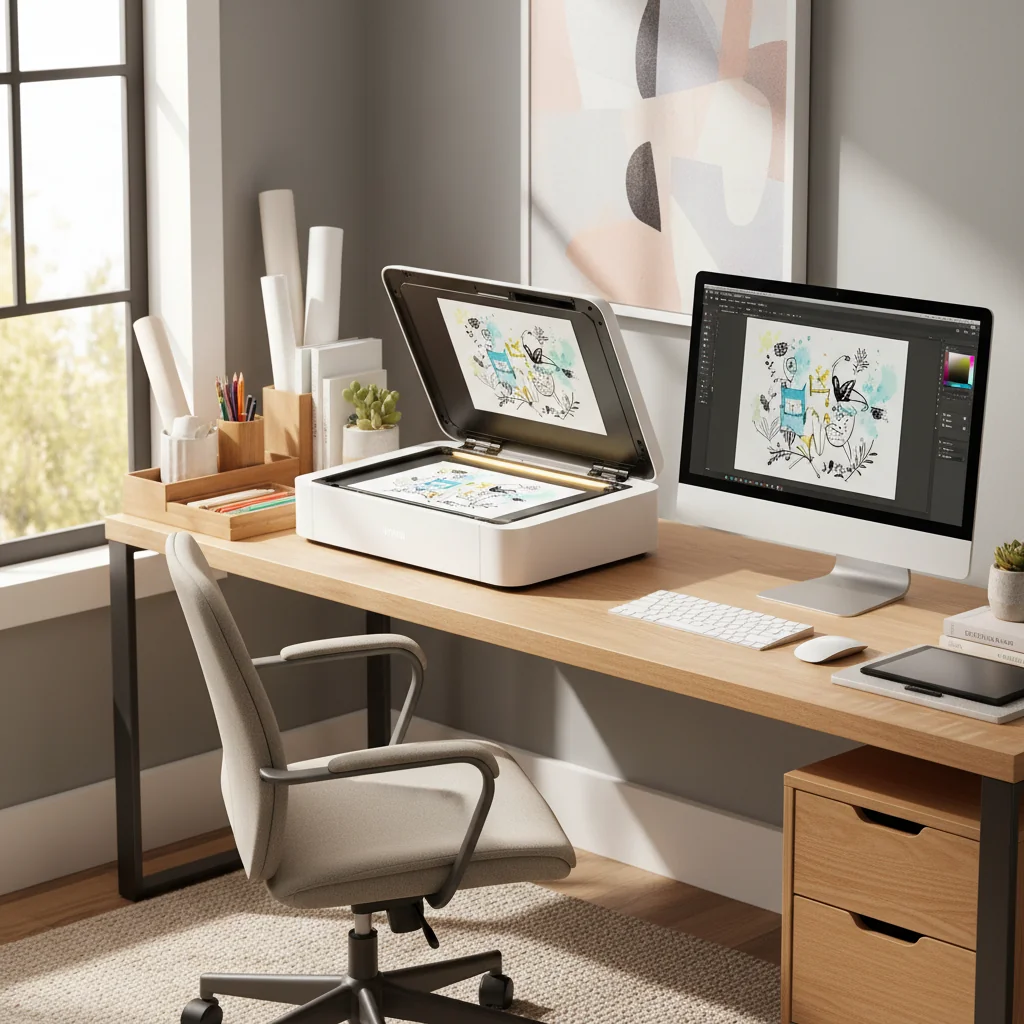
Step 2: Scanning or Photographing Your Artwork
#### Flatbed Scanner Method
#### Smartphone Camera Method
Step 3: Image Cleanup (Pre-Vectorization)
Before vectorizing, clean up your scan:
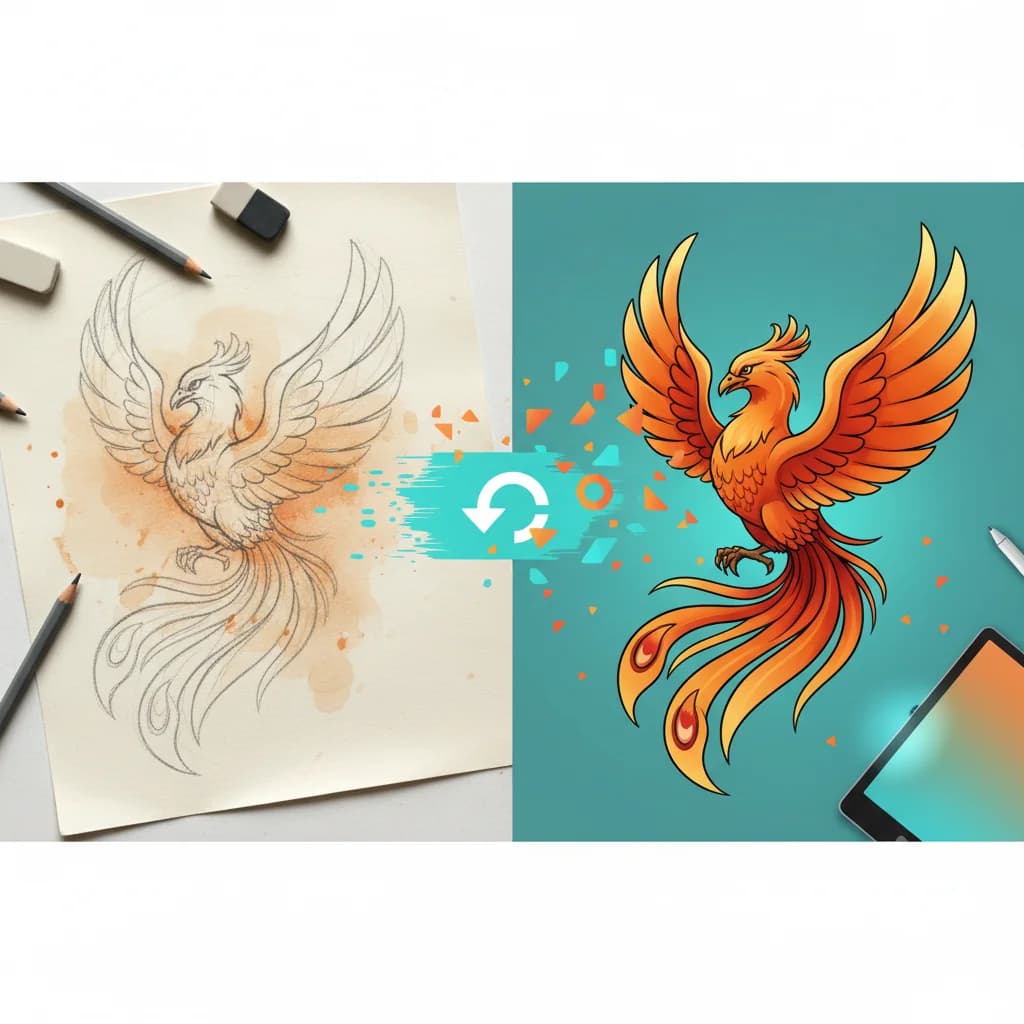
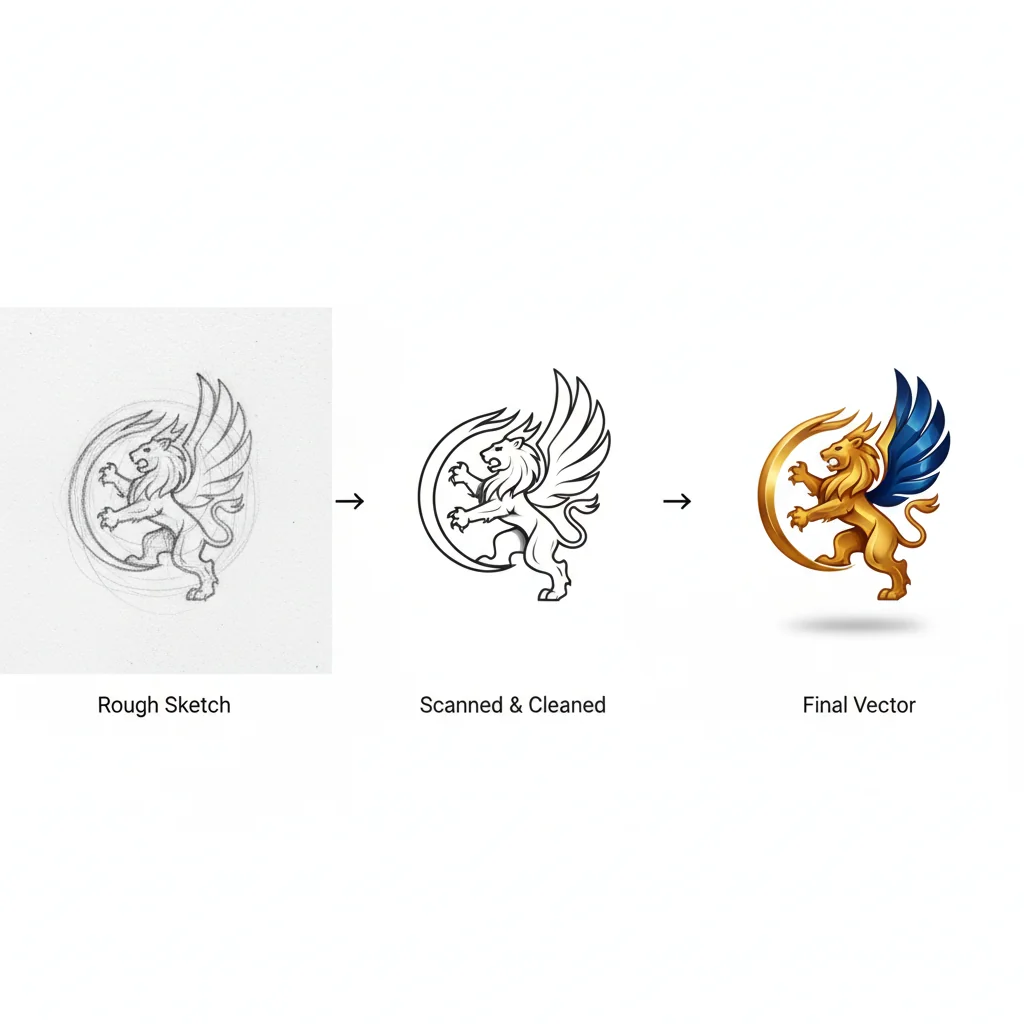
Step 4: AI Vectorization with VectoSolve
"VectoSolve is the first tool that doesn't destroy the hand-drawn character of my illustrations.
Step 5: Refining the Vector Output
In Adobe Illustrator or Inkscape (free):
Key Takeaways
- Start with high-contrast artwork (dark lines, white paper)
- Scan at 600 DPI for print, 300 DPI for web-only
- Remove background before vectorizing for cleanest results
- Use light smoothing to preserve hand-drawn character
- Simplify paths post-vectorization to reduce file size
Phone Camera vs Scanner Comparison
| Feature | Smartphone | Flatbed Scanner | Overhead Scanner | |---------|-----------|----------------|------------------| | Setup time | 30 seconds | 2 minutes | 1 minute | | Detail capture | Good (12+ MP) | Excellent | Excellent | | Color accuracy | Fair (lighting-dependent) | Excellent | Excellent | | Max size | Unlimited | 8.5"x11" or 11"x17" | A3-A2 | | Portability | Excellent | Poor | Poor | | Cost | $0 (have phone) | $80-$500 | $300-$2000 | | Best for | Large artwork, quick tests | Standard sizes, line art | Books, fragile art |
Tips for Different Art Styles
Line Art (Ink, Fine-Liner)
Watercolor/Ink Wash
Pencil/Charcoal
Colored Pencil/Marker
Ready to convert your images?
Try VectoSolve FreeCommon Mistakes and How to Avoid Them
Mistake 1: Drawing Too Lightly
Use 4B+ pencils with firm pressure, or trace with ink. Test scan early.Mistake 2: Textured Paper
Use smooth paper (bristol, marker paper) or increase DPI to 1200.Mistake 3: Poor Lighting (Phone Photos)
Use two light sources at 45-degree angles or scan near a large window.Mistake 4: Skipping Background Removal
Adjust Levels to pure white or use background removal tools.Mistake 5: Over-Smoothing
Start with light smoothing. You can simplify later, but can't add back lost character.Mistake 6: Wrong File Format
Mistake 7: Not Testing Early
Draw one test element, scan, vectorize, refine. Validate your workflow before completing the full artwork.What's the best DPI for scanning hand-drawn artwork?
600 DPI is the sweet spot for most use cases. Use 300 DPI for quick tests or web-only graphics. Go up to 1200 DPI only for extremely detailed technical illustration or archival reproduction. Higher DPI captures paper texture rather than useful detail.
Can I vectorize a photo of my sketch instead of scanning?
Yes, with modern smartphone cameras (12MP+) and good lighting. Use scanning apps like Adobe Scan or Microsoft Lens for auto-perspective correction. For professional work, flatbed scanners produce more consistent results.
Ready to convert your images?
Try VectoSolve FreeHow do I preserve the "imperfect" hand-drawn feel?
Use light smoothing during vectorization. Don't simplify paths too aggressively. Keep slight line weight variations and embrace small gaps or overlaps — they add character.
What if my vectorized sketch has too many anchor points?
In Illustrator: Object > Path > Simplify. In Inkscape: Path > Simplify (Ctrl+L). Target: 10-50 points per path for simple art, 100-300 for intricate illustrations.
Can I vectorize colored pencil or marker drawings?
Yes, but best for flat, bold color areas. Subtle gradients get posterized into color bands. Best practice: vectorize line work separately, then add flat vector color fills.
Ready to convert your images?
Try VectoSolve FreeWhat's the difference between auto-tracing and AI vectorization?
Traditional auto-tracing (Illustrator Image Trace, Inkscape Trace Bitmap) is algorithm-based. AI vectorization (VectoSolve) uses machine learning trained on millions of images — better at understanding subject vs noise, smarter edge detection, and cleaner output.
Can I sell products with vectorized sketches?
Yes — you own the copyright to your original artwork and all derivatives. VectoSolve doesn't claim any rights to your uploads or vectorized output.
Beyond Sketches: What Else Can You Vectorize?
Explore more: Hand Drawing to SVG | PNG to SVG | Image Upscaler
Ready to convert your images?
Try VectoSolve FreeStart Digitizing Today
The barrier between analog and digital art has never been lower. With a smartphone, free editing tools, and AI-powered vectorization, you can transform hand-drawn sketches into professional-grade vector files in under 30 minutes.
Your next steps:
Your hand-drawn work has value precisely because it's imperfect, human, and authentic in an AI-saturated world.
Sources: