From a Flat Image to a Multicolor 3D Print: Layered Logos, Signs and Desk Art with an AMS
The layered-extrusion workflow for turning a flat logo or graphic into a multicolor print: why stacked painter-model SVGs z-fight the moment you extrude them, how non-overlapping planar tiles fix it, and where filament-painting tools like HueForge are honestly the better choice.
Founder of VectoSolve
Self-taught developer, founder and sole developer of VectoSolve since 2024. He builds the conversion engine and the cutting, embroidery and 3D printing exports.
How this article was made: drafted with AI assistance, then edited and fact-checked before publication. About the author
Try it on your own file, in 3D Print mode
Free preview, no signup. Drop an image and see the vector before deciding anything.
Search "multicolor 3D print from image" and you mostly find lithophane generators and paint-on-model tutorials. Useful tools, but not for the job many people actually mean: taking a flat graphic, a logo, a team badge, a shop sign, a piece of desk art, and turning it into a printed object where every color is a crisp, solid region. That job has a specific pipeline, and the step that decides whether it works happens before the slicer ever opens. It is the vector file.
This guide walks through the layered-extrusion approach end to end: how it works, why most auto-traced files fail the moment you extrude them, and how to prepare a file that slices cleanly on an AMS-equipped printer. One thing to be clear about up front: VectoSolve starts from your image and makes the vector file. In 3D Print mode, once the file is unlocked, it also builds the 3D files from it: a 3MF project for Bambu Studio with one part per color, and one STL per color for other slicers. It does not produce printer G-code, and slicing stays in your slicer. Either way, what decides whether the print works is the flat geometry underneath, and that turns out to be most of the battle.
How layered extrusion turns a flat image into an object
A slicer cannot extrude a PNG. Pixels are just a grid of colors with no boundaries, so there is nothing to pull into 3D. An SVG is different: it defines each colored area as a closed outline, and slicers can import those outlines and extrude each one into a solid of whatever height you choose. Our guide to adding an SVG to Bambu Studio covers the import clicks; here we care about the geometry. One catch to know now: Bambu Studio merges all the colors of an imported SVG into one single part, which is why the workflow below ends with a 3MF rather than an SVG import.
There are two ways to use extruded regions for a multicolor result:
- Height-stacked layers. Each color becomes a region extruded to a different height: the background at 2 mm, the second color at 3 mm, details at 4 mm. You get a stepped bas-relief effect. This works even on a single-color printer with manual filament swaps at layer changes, and it reads as deliberate design rather than a compromise.
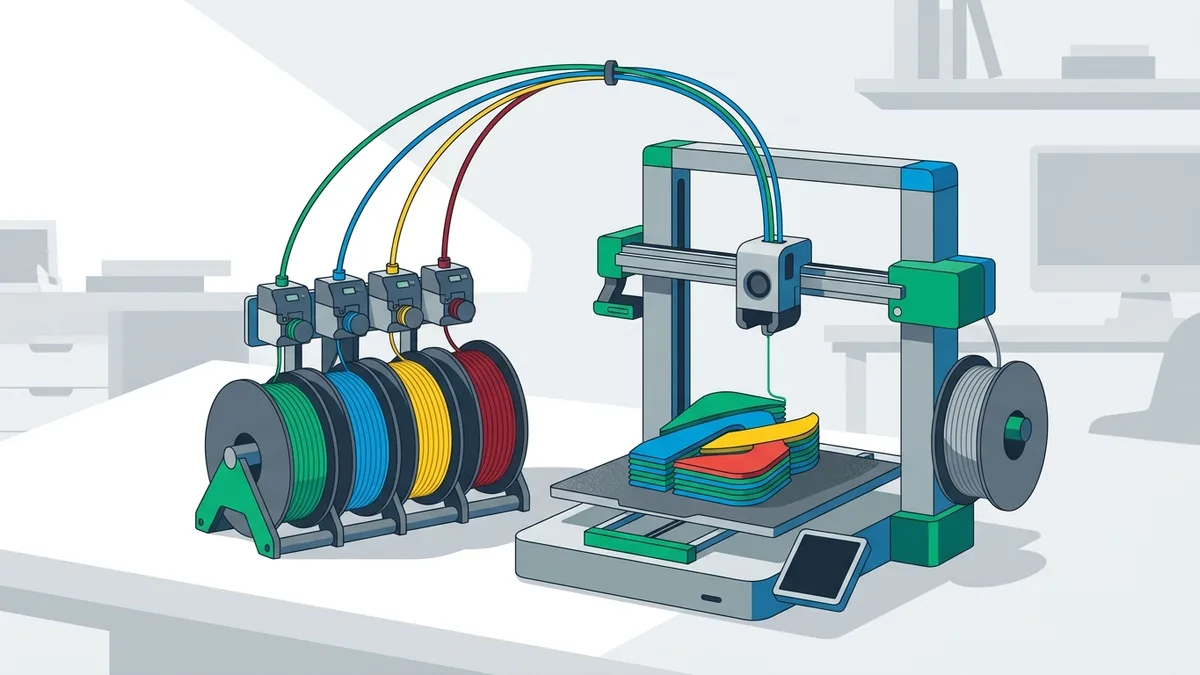
- Flat color regions with an AMS. Every region is extruded to the same height, each region is assigned a different filament, and the multi-material unit handles the swaps. The result is a flat plaque or sign with flush, inlaid colors, the look most people picture when they say multicolor.
Both approaches consume the same input: a set of flat vector shapes, exactly one per color. Which brings us to the trap.
Why overlapping vector shapes ruin the print
Nearly every automatic tracer, ours included in its default mode, outputs stacked shapes. The file contains a full-size background shape at the bottom, then progressively smaller shapes painted on top of it. On screen this renders perfectly, because SVG follows the painter's model: shapes drawn later cover shapes drawn earlier. The yellow star looks like it sits inside the blue circle. Geometrically, the star is floating on top of a circle that is still completely solid underneath it.
Rendering forgives that. Extrusion does not. Import a stacked file into a slicer, extrude every region, and three problems appear:
- Z-fighting. Two solids now occupy the same volume. Coincident faces flicker in the preview, and which color "wins" inside the shared region is undefined behavior, so it can differ between the preview and the sliced result.
- Non-manifold booleans. Slicers and CAD tools resolve overlapping solids with boolean operations, and booleans on perfectly coincident faces are numerically fragile. They can fail outright, or succeed while producing degenerate slivers that show up later as gaps and stray perimeter loops.
- The wrong object, even when it slices. Overlap means the background color physically runs underneath every foreground region. On a height-stacked print, your foreground colors are riding on a hidden slab of background filament, changing every height you specified. On a flat AMS print, two objects claim the same XY area and the slicer has to guess.
You can fix a stacked file by hand: open it in a vector editor and boolean-subtract each foreground shape from everything beneath it, shape by shape. For a three-shape logo that is five minutes of work. For a real traced graphic with dozens of curved paths, it is an evening, and one missed subtraction puts you right back in z-fighting territory.
The fix: non-overlapping planar tiles
What the slicer actually wants is a planar partition: every point of the design covered by exactly one shape. Tiles that share edges but never share area, like pieces of a stained-glass window rather than a stack of stickers.
We built this directly into the converter as Non-overlapping layers mode, developed with a 3D-printing customer who was extruding logo plaques and kept hitting exactly the failures described above. When the mode is on, every shape punches its footprint out of every shape below it, so only the visible region of each color survives as geometry. On real traced output we measured the pairwise overlap dropping from 63% of the drawn area to roughly 0.06%. That residual comes from curve-approximation slivers far thinner than a nozzle width, which is why, in our testing, extruded output from the mode slices without boolean complaints.
In 3D Print mode the converter applies it automatically on paid conversions (the free preview shows the trace, not this final geometry), and API users can request it with planar=true on the vectorize endpoint. The output is still a normal SVG, so it also behaves in Inkscape, Illustrator and laser software. If you work across machines, the SVG for 3D printing page covers the printing-specific details, and there is a dedicated SVG for Bambu Lab page for that ecosystem.
On its own, the mode still gives you a flat SVG. The 3D step comes next: the 3MF export turns each color region into a part, raises it on a base, and sets a filament on it. Print settings, and any height you want to change part by part, stay in your slicer.
A Full Year of Conversions for $49
Starter Annual: 25 conversions every month, $49 for the whole year. That is about $4.08 a month · Cancel anytime
Get the Annual DealColor count discipline: every color is a filament slot
In a multicolor extrusion workflow, each color in the vector file maps to one physical filament. Bambu Lab's official spec puts four filament slots in each AMS unit, expandable to sixteen colors by running up to four units in parallel — but most setups have a single unit, so four is the practical budget. A file that vectorizes into eleven colors is therefore not a multicolor print, it is a problem. And on single-nozzle multi-material systems, every color change purges material, so each additional color costs waste and print time on top of the slot it occupies.
The discipline has to happen before the slicer. When the 3MF is built, the number of colors is set to 4 by default, the size of one AMS. If the trace has more, the extra colors are merged into the closest ones, so anti-aliased edge noise folds into its parent regions instead of becoming dozens of near-duplicate shades, each asking for its own filament. Three or four colors covers the overwhelming majority of logos and signage, and constraint reads as intent: a four-color plaque looks designed, a fourteen-color one looks like an accident.
The workflow, start to finish
Here is the full path from image to printed object:
- Start from the cleanest image you have. High contrast, flat color areas, minimal JPEG smudging. PNG is the right container for this kind of graphic, and it is what most people arrive with: 68.6% of the 19,167 files converted on VectoSolve between April and July 2026 were PNGs, versus 14.6% JPGs. If your logo sits on a photo or cluttered backdrop, strip that first — 32.5% of paid conversions on the platform include a background-removal pass, and for a plaque it is the difference between tracing your logo and tracing your logo plus a rectangle of noise behind it. Then upload it to the image to 3MF converter, or to the converter on this page, which runs in the same 3D Print mode.
- Check the preview, then unlock the file. The unlocked conversion comes out as non-overlapping color regions, with no switch to flip.
- Set the number of colors to your filament slots, typically 4 for a single AMS unit, and the width you want to print.
- Download the 3MF and drag it into Bambu Studio. Each color is its own part, numbered with its filament, on a base: sync your AMS before slicing. OrcaSlicer opens the 3MF too; on PrusaSlicer or another slicer, use the ZIP of STL files: load them all at once as one object with several parts, then pick a filament for each.
- Sync the AMS and check the colors. Each part should sit on the spool you want. For a stepped bas-relief, change the height of each part in the slicer.
- Check the sliced preview. No flickering faces, no boolean warnings, each region showing the color you assigned. If the preview is clean, the print will be too, at least as far as the geometry is concerned.
Where this approach stops, honestly
Layered vector extrusion is the right tool for graphics with distinct flat colors. It is the wrong tool for photographs. A photorealistic image flattened to four vector colors loses exactly the gradients that made it worth printing, and no vectorizer setting recovers them. For photos, the established approaches work from the pixel data directly. Lithophanes encode brightness as material thickness for backlit viewing. HueForge-style tools do what their maker calls filament painting: stacking thin layers and calculating how much light filters through each one, because, as HueForge's own documentation puts it, "the thickness and order of each layer affects how light is filtered, which in turn, can create different colors than the true pigment of each filament." That technique needs no multi-material printer at all. Vectorizing first would destroy the pixel information those tools depend on, so we will not pretend our pipeline belongs there.
| Your source image | Best approach | File the workflow starts from |
|---|---|---|
| Logo, sign, badge, icon, line art | Layered vector extrusion (this guide) | Non-overlapping SVG, then a 3MF |
| Photo or gradient-heavy artwork | Filament painting (HueForge-style) | Original PNG/JPG |
| Backlit photo panel | Lithophane | Grayscale PNG |
If your image sits in the first row, the vector route gives you something the pixel-based methods cannot: sharp, scalable region boundaries that stay crisp whether the plaque is 50 mm or 500 mm wide.
Free SVG Tools for Crafters
Design Checker · Color Separator · Mat Preview · Offset Generator · Text to SVG
Check Your SVG FreeFAQ
Can VectoSolve export STL or 3MF directly?
Yes. In 3D Print mode, once your file is unlocked, you can download a 3MF project for Bambu Studio, with one part per color, each numbered with its filament, on a base (sync your AMS before slicing). You also get a ZIP with one STL per color for OrcaSlicer, PrusaSlicer and other slicers. Both are built in your browser from the unlocked SVG, with no separate charge. We still do not produce printer G-code: slicing stays in your slicer.
How many colors should I use for an AMS print?
Match your filament slots: four per AMS unit under Bambu Lab's spec, up to sixteen if you chain four units. Set the number of colors when the 3MF is built rather than trying to merge colors in the slicer, so anti-aliasing noise gets absorbed into clean regions before any geometry exists. Fewer colors also means fewer purge cycles, which saves both filament and print time.
Do I need Non-overlapping layers mode for a single-color print?
No. A single-color extrusion is one region, so there is nothing to overlap. The mode matters as soon as two or more colors become separate solids, whether they are stacked at different heights or sitting flush on the same plane.
What does a conversion cost?
Each conversion costs 0.20 credits. You get one free watermarked preview a day without signing up. The Starter plan is $7.99 a month for 25 conversions, or $49/yr for the same 25 every month. There are no trials; you can test the output quality on your own artwork through the free previews before paying anything.
Sources
- Bambu Lab AMS — Automatic Material System — official product spec: each AMS has 4 filament slots, and up to 4 AMS can run in parallel for a maximum of 16 colors.
- HueForge — official documentation of the filament-painting mechanism: colors are produced by controlling how light filters through thin stacked filament layers, with a live preview, and no multi-material printer required.
- Bambu Studio issue #8044 — the request for a real multicolor image and SVG import, filed in August 2025.