How to Convert Hand-Drawn Designs to SVG for Cricut (Step-by-Step)
Learn how to turn your hand-drawn sketches, lettering, and art into clean SVG cut files for your Cricut. Step-by-step guide with pro tips.
Founder and developer of VectoSolve
Self-taught developer who founded VectoSolve in 2024. He builds the conversion engine and the cutting, embroidery and 3D printing exports, working with the VectoSolve team of graphic designers.
How this article was made: drafted with AI assistance, then edited and fact-checked before publication. About the author
Try it on your own file, in Cricut mode
Free preview, no signup. Drop an image and see the vector before deciding anything.
Key Takeaways
- Use thick black markers on white paper for the cleanest SVG conversions -- thin pencil lines and colored pencils don't trace well
- Smartphone photos work great when taken from directly above in natural lighting with document scan mode enabled
- Close all shapes completely -- gaps in pen strokes create open paths that won't fill correctly when cutting vinyl
- VectoSolve's AI automatically removes backgrounds and smooths hand-drawn strokes while preserving the hand-made character
- Always do a test cut with a fresh blade before committing expensive materials on intricate hand-drawn designs
How to Convert Hand-Drawn Designs to SVG for Cricut (Step-by-Step)
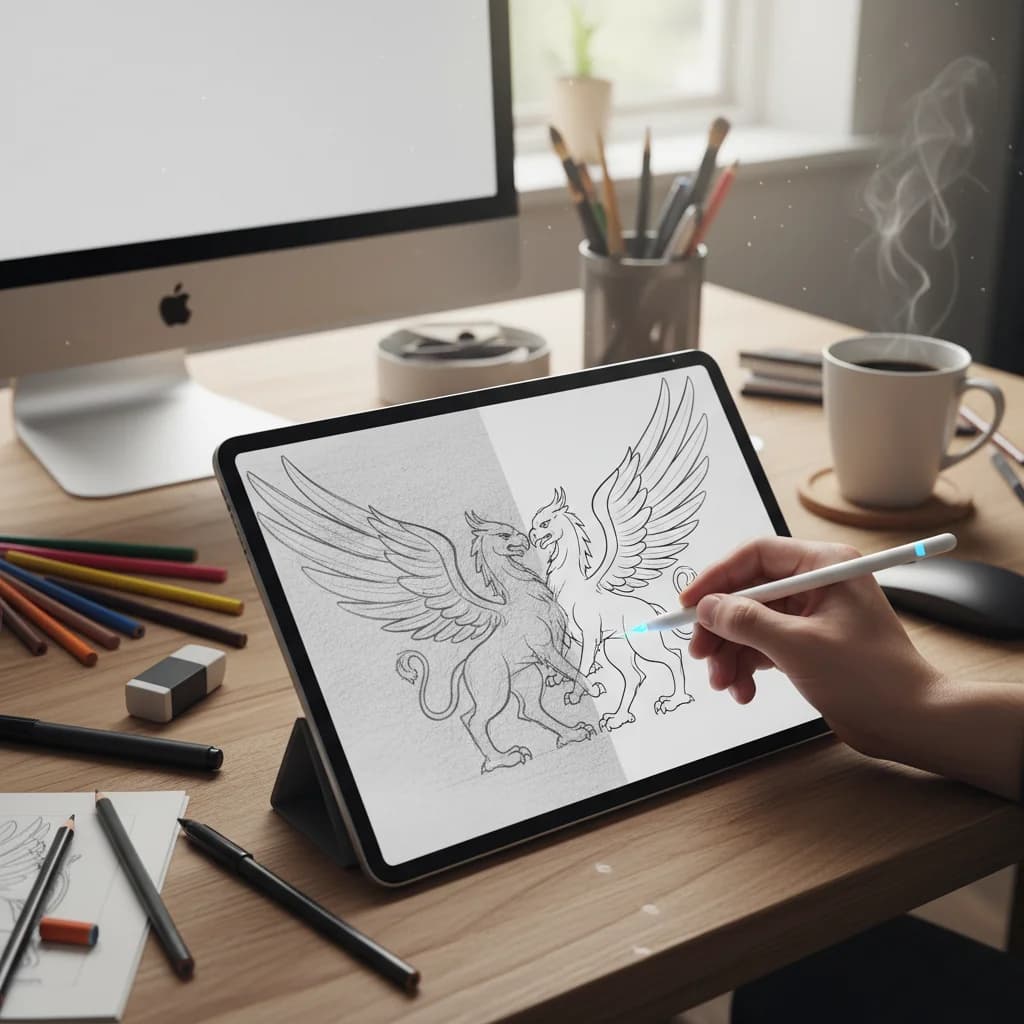
There's something special about hand-drawn designs. They have a warmth, personality, and authenticity that computer-generated graphics can't replicate. And the good news? You can turn your hand-drawn art into SVG cut files for your Cricut -- cutting your own custom creations onto vinyl, cardstock, iron-on, and more.
This guide walks you through the entire process, from pencil sketch to clean SVG file ready for Cricut Design Space.
What You'll Need
- Paper and pen/marker -- for your original drawing
- A smartphone or scanner -- to digitize your drawing
- An SVG converter -- we recommend VectoSolve for the best results
- Cricut Design Space -- to import and cut your SVG
- Your Cricut machine -- any model (Maker, Explore, Joy)
Step 1: Create Your Hand-Drawn Design
Start with your drawing. Here are tips to make the conversion process easier:
Use the Right Tools
- Thick markers or pens (Sharpie, Micron 05 or thicker) work best -- thin pencil lines often don't trace well
- Black ink on white paper gives the highest contrast and cleanest conversion
- Brush pens are great for hand lettering projects
- Avoid colored pencils or light gray graphite -- they don't scan well
Design Tips for Clean Conversions
- Keep lines bold and confident -- thin, sketchy lines create messy SVGs with too many nodes
- Close your shapes -- if you want a shape to be filled (like a heart or letter), make sure the outline is fully closed with no gaps
- Leave space between elements -- if lines are too close together, they may merge during tracing
- Use solid fills -- hatching and cross-hatching look cool on paper but create overly complex SVGs
- Keep it simple -- especially for your first few projects. A clean monogram or simple illustration converts far better than a detailed portrait
What Works Best
| Great for Conversion | Challenging for Conversion |
|---|---|
| Hand lettering & monograms | Detailed pencil shading |
| Simple illustrations | Watercolor paintings |
| Silhouettes & outlines | Photographs of drawings on textured paper |
| Bold doodles | Very fine line work |
| Mandala-style designs | Designs with many overlapping elements |
Pro Tip: The single most impactful thing you can do for clean conversions is use a thick black marker on bright white paper. A Sharpie on copy paper beats a fine-point pen on textured art paper every time for Cricut-ready results.
A Full Year of Conversions for $49
Starter Annual: 25 conversions every month, $49 for the whole year. That is about $4.08 a month · Cancel anytime
Get the Annual DealStep 2: Digitize Your Drawing
You need to get your physical drawing into a digital image file. You have two options:
Option A: Use Your Smartphone Camera (Easiest)
This is the fastest method and works surprisingly well with modern phone cameras.
How to get a great photo:
- Place your drawing on a flat surface -- a table or the floor works fine
- Use natural lighting -- position near a window. Avoid harsh overhead lights that create shadows
- Shoot from directly above -- hold your phone parallel to the paper, not at an angle. This prevents perspective distortion
- Fill the frame -- get as close as possible while keeping the entire drawing in the shot
- Tap to focus on the drawing, then take the photo
- Avoid flash -- it creates hotspots and uneven lighting
Pro tip: Many phones have a "Document Scan" mode (in the camera app or Notes app) that automatically corrects perspective and boosts contrast. Use it.
Option B: Use a Scanner (Best Quality)
If you have access to a flatbed scanner:
- Scan at 300 DPI minimum (600 DPI is even better)
- Use grayscale mode for black-and-white drawings
- Save as PNG (not JPEG -- JPEG compression adds artifacts that hurt tracing quality)
- Make sure the scanner glass is clean -- dust and smudges will appear in your scan
Step 3: Clean Up Your Image (Optional but Recommended)
Before converting to SVG, a quick cleanup can dramatically improve your results.
Quick Cleanup in Any Photo Editor
You can use your phone's built-in photo editor, Canva, or any free image editor:
- Increase contrast -- make the whites whiter and the blacks blacker
- Increase brightness slightly -- this helps remove paper texture and gray shadows
- Crop tightly -- remove any extra paper around your design
- Rotate if needed -- straighten the image so your design is level
Advanced Cleanup (Optional)
If you want the absolute cleanest result:
- Use a free tool like Photopea (online Photoshop alternative)
- Apply Levels adjustment: drag the white point slider left and the black point slider right until the background is pure white and your lines are pure black
- Erase any stray marks, smudges, or imperfections
- If you have multiple separate elements, consider cleaning each one individually
How clean does it need to be? Here's a rule of thumb: if you can clearly see the distinction between your drawing and the background when you squint at the image, it's clean enough.
Step 4: Convert to SVG with VectoSolve
Now for the magic -- turning your raster image into a vector SVG.
Why We Recommend VectoSolve
We've tested many converters (see our full comparison), and VectoSolve consistently produces the cleanest results for hand-drawn art because:
- The AI understands hand-drawn strokes and smooths them intelligently without losing character
- Automatic background removal means you don't need a perfectly white background
- Optimized node count keeps your SVG clean and Cricut-friendly
- It takes literally seconds -- no settings to configure
How to Convert
- Go to vectosolve.com
- Drag and drop your cleaned-up image (or click to upload)
- Wait a few seconds while the AI processes your image
- Preview the result -- you'll see a clean vector version of your drawing
- Download the SVG file
That's it. The SVG is ready for Cricut Design Space.
What If the Result Isn't Perfect?
If the conversion doesn't look quite right:
- Go back to Step 3 and increase the contrast more
- Thicken thin lines using a photo editor's brush tool before re-converting
- Simplify the design -- remove unnecessary details
- Try a higher resolution scan if you used a phone photo
Free SVG Tools for Crafters
Design Checker · Color Separator · Mat Preview · Offset Generator · Text to SVG
Check Your SVG FreeStep 5: Import into Cricut Design Space
Upload Your SVG
- Open Cricut Design Space
- Click New Project (or open an existing one)
- Click Upload in the left panel
- Click Upload Image
- Select your SVG file
- Design Space will show a preview -- verify it looks correct
- Choose "Save as a Cut Image"
- Click Insert to add it to your canvas
Verify Your Cut File
Before cutting, check these things:
- Zoom in on the design -- are the paths smooth? Are there any stray artifacts?
- Check the size -- resize as needed for your project
- Check layers -- click on the design and look at the Layers panel. Each color should be its own layer
- Weld if needed -- if your hand-drawn text has overlapping letters, use the Weld tool to combine them into one continuous cut path
- Attach if needed -- if you want multiple elements to maintain their position relative to each other during cutting
If your hand-drawn lettering has overlapping letters (which is common in script and cursive styles), you must use the Weld tool in Design Space before cutting. Without welding, Cricut will cut each letter individually, slicing through the overlapping areas and ruining the connected script look.
Step 6: Cut Your Design
Material Settings
For hand-drawn designs, these materials work great:
- Permanent vinyl -- for mugs, tumblers, car decals
- Iron-on / HTV -- for t-shirts and tote bags (remember to mirror!)
- Cardstock -- for cards, cake toppers, wall art
- Sticker paper -- for custom stickers (use Print Then Cut for colored designs)
Cutting Tips
- Always do a test cut with a new design, especially if it has fine details
- Use a fresh blade for intricate hand-drawn designs
- Slow down the pressure and speed for detailed cuts -- go to custom settings if needed
- Weed carefully -- hand-drawn designs often have delicate thin areas
Common Problems and Solutions
Problem: SVG has too many nodes / paths are jagged
Cause: Original image was too low resolution or too low contrast.
Fix: Re-scan at higher resolution, increase contrast, use a thicker pen for your drawing.
Problem: Small gaps in shapes that should be closed
Cause: Your pen strokes didn't fully connect on paper.
Fix: Use a photo editor to close the gaps before converting, or use the Contour tool in Design Space to hide unwanted cut lines.
Problem: Background is being traced along with the design
Cause: Paper texture, shadows, or insufficient contrast.
Fix: Use VectoSolve (it removes backgrounds automatically) or manually clean up the background in a photo editor first.
Problem: Design is too complex and Cricut struggles to cut it
Cause: Too many nodes, usually from overly detailed drawings.
Fix: Simplify your original drawing. For Cricut, less is more. Bold, clean lines always cut better than intricate details.
A Full Year of Conversions for $49
Starter Annual: 25 conversions every month, $49 for the whole year. That is about $4.08 a month · Cancel anytime
Get the Annual DealProject Ideas for Hand-Drawn SVGs
Once you've mastered the conversion process, here are some popular projects:
- Custom hand-lettered mugs -- draw your quote, convert to SVG, cut in vinyl
- Personalized t-shirts -- your own hand-drawn illustrations on iron-on
- Wedding signage -- hand-lettered names, table numbers, welcome signs
- Kids' drawings as stickers -- scan your child's art and turn it into stickers
- Custom logo stickers -- hand-drawn business logos for packaging
- Greeting cards -- hand-drawn designs cut from cardstock
- Wall art -- large-format hand-drawn designs cut from vinyl
Final Tips
- Practice makes perfect -- your first conversion might not be flawless, but you'll quickly learn what drawing style converts best
- Bold is better -- when in doubt, go thicker with your pen strokes
- White paper, black ink -- this combination gives you the most reliable results every time
- Save your original drawings -- you can always re-scan and re-convert as tools and your skills improve
- Start simple -- a hand-lettered word or simple doodle is the perfect first project
Ready to turn your hand-drawn art into Cricut-ready SVGs? Try VectoSolve free -- upload your drawing and get a clean SVG in seconds.