
SVG Files for Sublimation: Everything You Need to Know
Learn how SVG files work with sublimation printing. When to use SVG vs PNG for sublimation and how to get the best results on mugs, tumblers, and shirts.
Founder and developer of VectoSolve
Self-taught developer who founded VectoSolve in 2024. He builds the conversion engine and the cutting, embroidery and 3D printing exports, working with the VectoSolve team of graphic designers.
How this article was made: drafted with AI assistance, then edited and fact-checked before publication. About the author
Try it on your own file, in Cricut mode
Free preview, no signup. Drop an image and see the vector before deciding anything.
Key Takeaways
- SVG is the ideal format for sublimation printing because it maintains crisp edges and vibrant colors at any size
- Always design in RGB color mode -- sublimation inks are dye-based and map directly to RGB, not CMYK
- Mirror your image before printing -- this is the single most common sublimation mistake beginners make
- Substrate choice dramatically affects color output; polyester content must be 65% or higher for vivid results
- Proper temperature, pressure, and time settings vary by substrate and are non-negotiable for quality transfers
What Is Sublimation Printing?
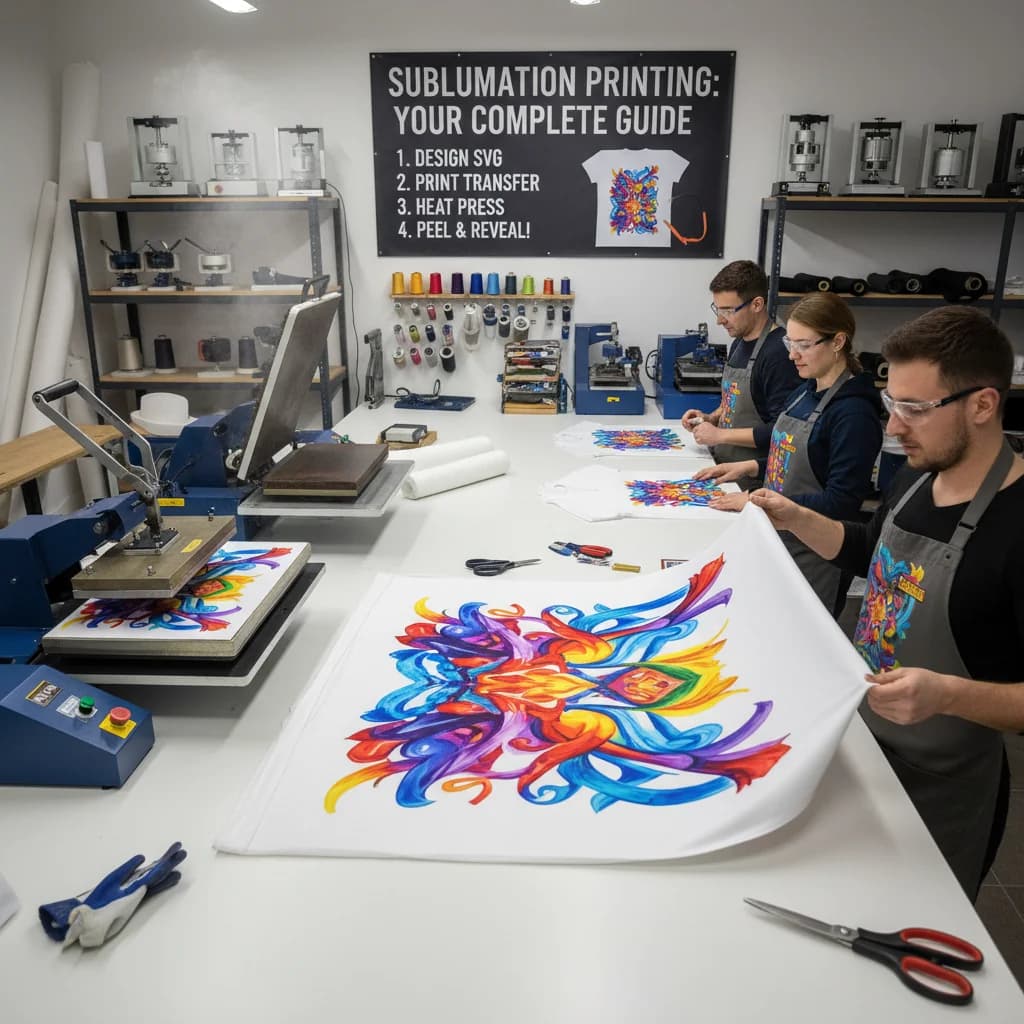
Sublimation printing is a digital printing technique where heat and pressure convert solid dye particles into a gas that bonds permanently with polyester-coated or polymer-based substrates. Unlike screen printing or direct-to-garment (DTG) methods, sublimation produces full-color, photographic-quality prints that won't crack, peel, or fade over time because the dye literally becomes part of the material.
The process works in three stages:
- Print -- Your design is printed onto special sublimation transfer paper using sublimation inks
- Press -- The printed transfer is placed face-down on the substrate and heated in a heat press
- Bond -- Under heat (typically 380-400°F), the solid ink converts to gas and permanently infuses into the polyester fibers or polymer coating
This is precisely why your source file format matters so much. The quality of your input file directly determines the quality of your sublimated output -- and that's where SVG files shine.
SVG vs PNG for Sublimation: Why Vector Wins
When preparing artwork for sublimation, you'll typically choose between two file types: SVG (Scalable Vector Graphics) and PNG (Portable Network Graphics). While both can produce acceptable results, SVG is the professional's choice for sublimation work.
The Core Difference
SVG files store images as mathematical equations describing points, lines, curves, and colors. PNG files store images as a grid of colored pixels. This fundamental difference has massive implications for sublimation:
| Feature | SVG (Vector) | PNG (Raster) |
|---|---|---|
| Scalability | Infinite -- no quality loss at any size | Fixed resolution; degrades when enlarged |
| File size | Small for graphics and logos | Large at high resolutions |
| Color precision | Exact color values per element | Color data per pixel |
| Edit flexibility | Individual elements fully editable | Flat pixel grid; difficult to modify |
| Best for | Logos, text, patterns, geometric designs | Photographs, complex gradients |
| Sublimation quality | Razor-sharp at every substrate size | Requires 300 DPI minimum for clarity |
When PNG is acceptable: If you're sublimating photographic images (landscape photos, portraits, photo collages), a high-resolution PNG at 300 DPI or higher at the final print size is perfectly fine. Sublimation excels at photo reproduction. However, for logos, text, patterns, and graphic designs, SVG is always the superior choice.
Resolution Math for Sublimation
If you must use a raster format, here's the minimum resolution you need:
- Mugs (11oz standard): Print area ~9.5" x 3.5" → minimum 2850 x 1050 pixels at 300 DPI
- T-shirts (full front): Print area ~12" x 14" → minimum 3600 x 4200 pixels at 300 DPI
- Mouse pads: Print area ~9" x 7" → minimum 2700 x 2100 pixels at 300 DPI
With SVG? None of this math matters. You export at whatever size you need, and the output is always perfectly sharp.
Color Management: RGB Is Your Best Friend
Here's where sublimation diverges from traditional print wisdom. If you've worked in offset or screen printing, you've been trained to design in CMYK. For sublimation, you need to unlearn that habit.
Why RGB for Sublimation?
Sublimation inks are dye-based inks that map to an RGB color model. The printer driver and ICC color profiles handle the conversion from your RGB design to the specific ink combinations needed. When you supply a CMYK file:
- The sublimation software converts it back to RGB
- Then the printer driver converts RGB to its ink mapping
- Each conversion introduces color shifting and gamut compression
By designing in RGB from the start, you eliminate an entire conversion step and preserve maximum color accuracy.
Warning: Critical Color Warning: Never convert an RGB design to CMYK and then back to RGB before sublimating. Each conversion permanently destroys color data. A red that starts as RGB(255, 0, 0) might end up as RGB(237, 28, 36) after a round-trip through CMYK -- and that difference is absolutely visible on a sublimated product.
SVG Color Tips for Sublimation
When building your SVG files for sublimation:
- Use hex codes or RGB values in your SVG markup (e.g.,
fill="#FF6B35"orfill="rgb(255,107,53)") - Avoid named colors like
fill="red"-- they're ambiguous and may render differently across software - Test your specific ink/printer combo -- every sublimation printer has a slightly different color gamut
- Create a color swatch test print before committing to a large production run
A Full Year of Conversions for $49
Starter Annual: 25 conversions every month, $49 for the whole year. That is about $4.08 a month · Cancel anytime
Get the Annual DealSubstrate Compatibility Reference
Not all substrates are created equal for sublimation. The key variable is polymer content -- sublimation dye needs polyester fibers or a poly-coating to bond with.
| Substrate | Poly Content | Color Vibrancy | Durability | Notes |
|---|---|---|---|---|
| 100% Polyester Fabric | 100% | Excellent | Excellent | Best results; colors are vivid and permanent |
| 65/35 Poly-Cotton Blend | 65% | Good | Good | Produces a vintage/faded look; cotton fibers don't absorb dye |
| Ceramic Mugs (coated) | Poly-coated | Excellent | Excellent | Must use sublimation-specific coated mugs |
| Aluminum Panels | Poly-coated | Excellent | Outstanding | ChromaLuxe and similar; best for photo reproduction |
| Ceramic Tiles | Poly-coated | Very Good | Good | Great for coasters, decorative pieces; seal edges for durability |
| Glass Cutting Boards | Poly-coated | Very Good | Very Good | Print appears through the glass; design must be mirrored |
| Mouse Pads | Polyester top | Excellent | Very Good | Easy beginner substrate; forgiving with temperature |
| Phone Cases | Poly-coated | Good | Moderate | 3D wrap cases need special jigs; flat cases are straightforward |
| 50/50 Cotton Blend | 50% | Fair | Fair | Noticeable fading; not recommended for professional work |
| 100% Cotton | 0% | Poor | Poor | Dye washes out almost immediately; do not use for sublimation |
Pro Tip: When sublimating onto garments, always choose white or very light-colored polyester. Sublimation inks are transparent -- they don't include white ink. Any design printed on a dark substrate will be invisible or severely muted. If you need prints on dark garments, consider DTG or heat transfer vinyl (HTV) instead.
Design Tips for Sublimation-Ready SVGs
Creating SVGs specifically for sublimation requires some adjustments compared to designing for screen or standard print.
1. Extend Your Bleed Area
Always add 0.125" (3mm) bleed beyond the trim line of your substrate. For wrapped products like mugs or phone cases, extend the bleed even further -- 0.25" (6mm) -- to account for alignment variation during pressing.
2. Avoid Thin Lines and Fine Detail
Sublimation involves gas diffusion, which means the dye spreads microscopically during transfer. Lines thinner than 0.5pt may bleed or disappear. In your SVG:
- Set minimum stroke widths to
stroke-width="0.75"or higher - Avoid hairline borders on small elements
- Test fine text at target size before production
3. Use Solid Fills Over Gradients When Possible
While sublimation handles gradients reasonably well, solid color fills produce the most predictable and vibrant results. If you need gradients, keep them broad and avoid transitions between very similar colors (they can band visibly).
4. Account for the White Substrate
Since sublimation has no white ink, any area of your SVG with no fill or a white fill will simply show the substrate color. Use this intentionally in your designs -- it's not a limitation, it's a design feature.
5. Design at Final Output Size
Even though SVGs scale perfectly, design at the actual output dimensions to accurately judge visual weight, spacing, and readability. What looks balanced on a 15" monitor may feel completely different printed on a 3" wide mug.
File Preparation Workflow
Follow this step-by-step workflow to go from SVG design to sublimation-ready print file:
Step 1: Design in RGB Color Space
Create your SVG in Illustrator, Inkscape, or Affinity Designer with the document color mode set to RGB. Verify all fills and strokes use RGB or hex color values.
Step 2: Size to Final Dimensions + Bleed
Set your artboard to the exact substrate print area plus bleed. For an 11oz mug, that's approximately 9.75" x 3.75" (including 0.125" bleed on all sides).
Step 3: Convert Text to Outlines
Select all text elements and convert to outlines/paths. This eliminates font dependency issues and ensures your text renders exactly as designed on any system.
Step 4: Flatten Transparency
If your SVG uses opacity, blend modes, or transparency, flatten these before export. Sublimation RIP software may interpret transparency differently than your design application.
Step 5: Export for Printing
Export your SVG as a high-resolution PNG (300 DPI minimum) at final print size for your sublimation RIP software, OR send the SVG directly if your software supports it. Many modern sublimation workflows accept SVG natively.
Step 6: Apply ICC Color Profile
If your RIP software supports ICC profiles (most do), apply the printer-specific and substrate-specific profile provided by your ink or printer manufacturer. This is the single biggest factor in color accuracy.
Step 7: Mirror the Image
For all sublimation transfers, mirror/flip your design horizontally before printing. The printed side goes face-down against the substrate during pressing.
Warning: Do not skip the mirror step. Every sublimation beginner has wasted transfer paper and substrates by forgetting to mirror. If your design contains text or directional elements, an un-mirrored transfer ruins the product entirely. Some RIP software has an auto-mirror setting -- verify it's enabled.
Free SVG Tools for Crafters
Design Checker · Color Separator · Mat Preview · Offset Generator · Text to SVG
Check Your SVG FreeCommon Sublimation Mistakes and How to Avoid Them
Even experienced sublimation printers encounter these issues. Here's your troubleshooting reference:
Mistake 1: Forgetting to Mirror
Symptom: Text appears backwards; directional designs are reversed.
Fix: Always enable mirror/flip in your print settings. Double-check by holding the printed transfer up to a mirror before pressing.
Mistake 2: Color Shift (Designing in CMYK)
Symptom: Colors appear duller, more muted, or shifted from what you see on screen.
Fix: Design in RGB. Use your printer's ICC profile. Print a test swatch on the actual substrate before production runs.
Mistake 3: Ghosting (Image Blur/Shadow)
Symptom: A faint double image or shadow appears around the design.
Fix: Secure the transfer paper firmly with heat-resistant tape. Use a heat press (not an iron) for consistent pressure. Don't move the substrate immediately after pressing.
Mistake 4: Pressing on Low-Poly Fabrics
Symptom: Colors are extremely faded, washed out, or disappear after washing.
Fix: Verify polyester content is 65% or higher. For blended fabrics, accept that colors will be intentionally muted.
Mistake 5: Moisture in the Substrate
Symptom: Blurry transfer, color inconsistency, or spotting.
Fix: Pre-press the substrate for 5-10 seconds to drive off moisture before applying the transfer. This is especially important for fabrics.
Temperature, Time & Pressure Reference
Use this table as a starting point. Always defer to your specific ink manufacturer's recommendations and run test pieces first.
| Substrate | Temperature | Time | Pressure | Special Notes |
|---|---|---|---|---|
| Polyester Fabric | 385°F / 196°C | 45-60 sec | Medium | Pre-press 5 sec to remove moisture |
| Poly-Cotton Blend | 385°F / 196°C | 45 sec | Medium | Shorter time reduces scorching on cotton fibers |
| Ceramic Mugs | 400°F / 204°C | 180-240 sec | Mug press (firm) | Use mug press or mug wrap; oven method as alternative |
| Aluminum Panels | 400°F / 204°C | 60-90 sec | Medium-Firm | ChromaLuxe recommends specific profiles per panel type |
| Ceramic Tiles | 400°F / 204°C | 120-180 sec | Light-Medium | Too much pressure can crack tiles; use felt padding |
| Mouse Pads | 385°F / 196°C | 45-60 sec | Medium | Very forgiving; great for beginners to practice on |
| Glass Items | 400°F / 204°C | 120-180 sec | Light | Requires poly-coated glass; handle with care when hot |
| Phone Cases | 400°F / 204°C | 90-120 sec | 3D jig or flat press | 3D cases need specialized vacuum or clamp jig |
Pro Tip: Temperature Consistency Matters More Than Exact Numbers. A heat press that holds steady at 390°F will produce better results than one that fluctuates between 380°F and 400°F. Invest in an external temperature gauge to verify your press's accuracy -- many affordable presses are off by 10-20°F from their displayed reading.
Final Thoughts
SVG files and sublimation printing are a natural pairing. The scalability, color precision, and editability of vector graphics solve many of the quality challenges that plague sublimation workflows built around raster images. By designing in SVG with an RGB color space, properly preparing your files, and respecting the unique requirements of each substrate, you'll produce sublimated products with professional-grade quality every time.
The investment in learning proper SVG-to-sublimation workflows pays dividends across every product you create -- from custom mugs and apparel to aluminum art panels and home decor. Start with forgiving substrates like mouse pads, dial in your color profiles, and scale up to more demanding products as your confidence grows.
| Sublimation Surface | Recommended DPI | Color Mode | Mirror Required |
|---|---|---|---|
| Polyester T-shirt | 300 DPI | RGB | Yes |
| Ceramic mug | 300 DPI | RGB | Yes |
| Tumbler (20 oz) | 300 DPI | RGB | Yes |
| Mouse pad | 200–300 DPI | RGB | Yes |
| Phone case (polymer) | 300 DPI | RGB | Yes |