
Vinyl Cutting for Beginners: Your First Custom T-Shirt in 30 Minutes
Complete beginner's guide to making your first custom t-shirt with HTV vinyl and a cutting machine. From design to press in 30 minutes.
Founder and developer of VectoSolve
Self-taught developer who founded VectoSolve in 2024. He builds the conversion engine and the cutting, embroidery and 3D printing exports, working with the VectoSolve team of graphic designers.
How this article was made: drafted with AI assistance, then edited and fact-checked before publication. About the author
Try it on your own file, in Cricut mode
Free preview, no signup. Drop an image and see the vector before deciding anything.
Key Takeaways
- Make a professional custom t-shirt in under 30 minutes with a cutting machine, HTV, and a heat press or iron
- Always mirror your design before cutting — the single most common beginner mistake
- Temperature, pressure, and time are the holy trinity of a successful press
- Start with Siser EasyWeed on 100% cotton for the most forgiving first experience
- VectoSolve converts any image into a cut-ready SVG in seconds
Your First Custom T-Shirt: A Complete Beginner's Guide to HTV
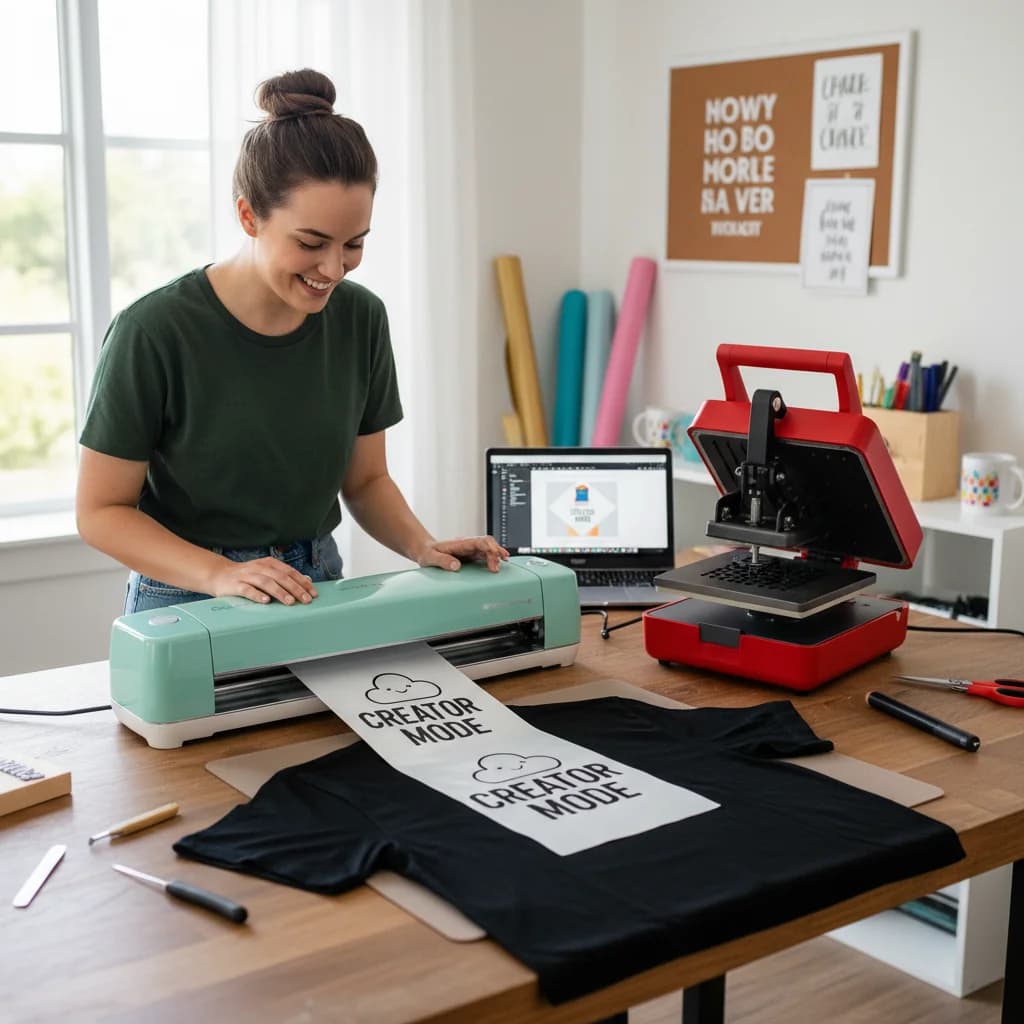
Peeling back the carrier sheet on a first heat transfer vinyl project feels like magic, even when the design is just a simple pet silhouette on a blank shirt. It feels even better when someone asks where you bought it.
That is the hook. But the road to a perfect shirt is often paved with mirroring disasters, scorched fabric, and vinyl that peels off in the wash. This guide covers the entire process, including the lessons beginners usually learn the hard way.
"There's nothing quite like wearing something you made yourself. The first time someone asks where you got your shirt and you say 'I made it,' you'll understand.
Complete Supply List
| Supply | Recommendation | Approx. Cost |
|---|---|---|
| Cutting machine | Cricut Explore Air 3 or Silhouette Cameo 4 | $150–$300 |
| Heat transfer vinyl | Siser EasyWeed 12×10 in sheets | $2–$5/sheet |
| Heat press or iron | Mini press or household iron | $40–$200 / free |
| Blank t-shirt | Bella+Canvas 3001, 100% cotton | $4–$8 |
| Cutting mat | StandardGrip (green) | $8–$13 |
| Weeding tools | Hook pen + tweezers | $5–$10 |
| Heat-resistant tape | Holds design during pressing | $5–$8 |
| Teflon sheet | Protects vinyl and press surface | $5–$10 |
| SVG design file | Create at VectoSolve or browse templates | Free templates, or a plan from $7.99/month |
Pro Tip: Budget start: You can begin for under $200 if you use a household iron and grab a Cricut Joy. Upgrade to a press later when you know you love it.
HTV Types Compared
| Type | Finish | Weedability | Best For | Beginner Friendly? |
|---|---|---|---|---|
| Regular (EasyWeed) | Smooth matte | Very easy | First projects, text | Yes — start here |
| Glitter | Sparkly, textured | Moderate | Party shirts, accents | Moderate |
| Flock | Soft, velvety | Easy | Cozy feel, lettering | Yes |
| Holographic | Rainbow reflective | Moderate | Statement pieces | Moderate |
| Patterned | Pre-printed designs | Easy | Layered looks | Yes |
Buy a 5-pack of EasyWeed in assorted colors for your first projects. Once you nail the basics, try glitter or flock as a reward — the technique is the same, only the material handling changes.
A Full Year of Conversions for $49
Starter Annual: 25 conversions every month, $49 for the whole year. That is about $4.08 a month · Cancel anytime
Get the Annual DealStep-by-Step: Design to Finished Shirt
Step 1: Create or Find Your SVG Design
Your cutting machine needs vector files — specifically SVGs.
- Sketch your design on paper or find an image you love
- Upload to VectoSolve to convert it into a clean, cut-ready SVG
- Or browse the template library for pre-made designs
- Import the SVG into Cricut Design Space or Silhouette Studio
Step 2: Mirror and Prepare
Pro Tip: ALWAYS mirror your HTV designs before cutting. HTV is cut face-down — carrier sheet against the mat, vinyl side up — so the design must be reversed. Skip this and your text reads backwards on the shirt. Every. Single. Time. Mirror it.
- Toggle Mirror to ON in your cut settings panel
- Resize your design to fit the shirt chest area
- Double-check — text should look backwards on screen before cutting
Step 3: Cut Your Vinyl
- Place HTV on mat with shiny carrier sheet DOWN, vinyl color side UP
- Load the mat into your machine
- Select material: "Iron-On" (Cricut) or "Heat Transfer, Smooth" (Silhouette)
- Press cut — it cuts the vinyl but NOT the carrier sheet
Cut Settings Quick Reference
────────────────────────────
Cricut Explore/Maker:  Iron-On, default pressure
Silhouette Cameo:      Blade 2-3, Speed 5, Force 8-12
Step 4: Weed Your Design
- Keep vinyl on the mat for stability
- Peel away large excess areas from outside edges first
- Use a weeding hook for small interior pieces (insides of A, O, D, B)
- Work under bright light — an angled lamp reveals tiny leftover bits
- Go slowly — rushing pulls up parts of your design
Step 5: Press Your Design
Warning: Temperature and pressure are critical. Too hot and you'll scorch the fabric or melt the vinyl into an unrecoverable mess. Too cold and it won't adhere. Always check your vinyl brand's recommended settings — they vary. Do a test press on scrap fabric first. Holographic HTV, for example, needs a lower temperature than standard HTV.
With a heat press (recommended):
- Pre-press shirt 3–5 seconds to remove moisture
- Position weeded design face-down on shirt
- Cover with a Teflon sheet
- Press at 305°F / 150°C for 15 seconds, medium-firm pressure
- Peel carrier sheet warm or cold per vinyl brand instructions
With a household iron:
- Set to cotton/linen — NO STEAM
- Place design face-down, cover with parchment paper
- Press firmly 30–45 seconds per section — do NOT slide the iron
- Flip shirt inside-out and press from the back for 15 seconds
- Let cool, then peel carrier sheet
Step 6: The Reveal
Let the shirt cool completely. Gently test a corner — if it lifts, place the carrier sheet back and press again for 5–10 seconds.
Heat Press vs. Iron: Honest Comparison
| Factor | Heat Press | Household Iron |
|---|---|---|
| Temperature control | Precise digital readout | Vague low/med/high |
| Pressure consistency | Even across surface | Uneven, arm-dependent |
| Success rate | 95%+ once dialed in | 70–80% with practice |
| Multi-layer projects | Excellent | Difficult — layers shift |
| Speed | 15 sec per press | 45–60 sec + back press |
| Cost | $40–$200+ | Free (you own one) |
| Best for | Regular crafting, selling | Testing the hobby |
My advice: Start with your iron. If you make more than 5 shirts and want to keep going, a mini heat press ($40–$60) is the single best upgrade. The consistency alone is worth every penny.
Troubleshooting Common Problems
These are the problems beginners run into most often.
| Problem | Likely Cause | Fix |
|---|---|---|
| Vinyl peels off | Not enough heat/time/pressure | Re-press 10 sec; increase temp 5°F |
| Won't stick at all | Moisture, wrong side, or wrong fabric | Pre-press shirt; verify vinyl face-down |
| Cracks after wash | Too much heat or washed wrong | Lower temp 10°F; wash inside-out cold |
| Design is backwards | Forgot to mirror | Wasted piece — always mirror next time |
| Jagged edges | Dull blade or wrong pressure | Replace blade; verify material setting |
| Carrier won't peel | Over-pressed or needs cold peel | Let cool completely; check brand instructions |
| Small pieces lift when weeding | Cut too shallow | Increase blade depth by 1; test cut |
| Scorch mark on shirt | Temp too high or pressed too long | Use Teflon sheet; reduce temp (permanent damage) |
Free SVG Tools for Crafters
Design Checker · Color Separator · Mat Preview · Offset Generator · Text to SVG
Check Your SVG FreeGarment Care: Making Your Design Last
You put in the work — don't let the washing machine undo it:
- Wait 24 hours before first wash — let adhesive fully cure
- Turn inside-out every wash to protect the design
- Cold water only — heat degrades the vinyl bond
- Mild detergent — no bleach or softener on the design
- Tumble dry low or hang dry — high dryer heat kills HTV longevity
- Never iron directly on vinyl — use parchment paper over the design
- Skip dry cleaning — solvents dissolve HTV adhesive
Pro Tip: Pro move: Include a small care card with every shirt you sell or gift. Takes two minutes and saves the heartbreak of someone ruining your work in a hot wash.
Start Pressing Today
The gap between "I want to try making shirts" and actually doing it is smaller than you think. Grab a blank tee, a sheet of EasyWeed, and a design you love. Your first shirt won't be your best, but it will be the one that gets you addicted.
"The first custom shirt you make will be imperfect. You'll love it more than anything you've ever bought.
Convert your first design at VectoSolve and make something you're proud to wear.
| HTV Type | Temperature (°F) | Press Time (sec) | Peel Method |
|---|---|---|---|
| Standard HTV | 305–315 | 10–15 | Warm peel |
| Glitter HTV | 320–330 | 15–20 | Cold peel |
| Flock HTV | 305–320 | 15–20 | Warm peel |
| Stretch / athletic HTV | 305–315 | 10–15 | Cold peel |
| Holographic HTV | 285–300 | 10–12 | Cold peel |