
How to Turn Hand-Drawn Designs into Cricut Cut Files
From paper sketch to Cricut cut file in under a minute. Here's the easiest way to digitize your hand-drawn art for vinyl cutting, paper crafts, and more.
Founder and developer of VectoSolve
Self-taught developer who founded VectoSolve in 2024. He builds the conversion engine and the cutting, embroidery and 3D printing exports, working with the VectoSolve team of graphic designers.
How this article was made: drafted with AI assistance, then edited and fact-checked before publication. About the author
Try it on your own file, in Cricut mode
Free preview, no signup. Drop an image and see the vector before deciding anything.
Your Drawings Are Already Good Enough — Seriously
Let me tell you something nobody in the craft world says often enough: you don't need to be an artist to make stunning Cricut projects from your own drawings. That wobbly heart your kid drew? That goofy doodle of your dog? Your slightly-uneven hand lettering? Those are gold. Those imperfections are what make handmade gifts actually feel handmade.
Plenty of crafters draw their own Cricut designs with stick figures that look like they're having a medical emergency, and their personalized mugs, custom T-shirts, and vinyl decals still get compliments. Why? Because they're theirs. They have character. And turning them into cut-ready SVGs is way easier than you think.

Why Hand-Drawn Designs Beat Clipart Every Time
Sure, you can download a free SVG from the internet. Millions of people do. And millions of people end up with the exact same "Live Laugh Love" sign on their wall.
When you draw your own design — even imperfectly — you get something nobody else has. Your handwriting is literally unique to you. That little flourish you add to your letters, the way you draw stars, the specific wobbly circle that somehow looks charming — that's your superpower.
"Your handwriting is your superpower. No font file can replicate the personality in your pen strokes — and that's exactly why hand-drawn Cricut projects stop people in their tracks."
Choosing Your Drawing Tools
You don't need fancy supplies to create Cricut-worthy drawings. Here's an honest comparison of what works, what's overkill, and what to start with.
| Tool | Line Quality | Best For | Cost | Beginner-Friendly? |
|---|---|---|---|---|
| Sharpie (fine or chisel tip) | Bold, consistent | Vinyl decals, bold designs | ~$5 | Yes — start here |
| Brush pen (Tombow, Pentel) | Varied thickness, expressive | Hand lettering, calligraphy | ~$8-15 | Moderate |
| iPad + Apple Pencil | Ultra-precise, editable | Complex illustrations, layered designs | ~$350+ | Moderate |
| Wacom tablet | Precise, pressure-sensitive | Digital-native workflows | ~$60-300 | Steeper learning curve |
The honest recommendation? Start with a Sharpie and white printer paper. Seriously. You can always upgrade later, and plenty of good cut designs start as quick Sharpie sketches on copy paper.
Pro Tip: Draw with thick outlines for better Cricut cuts. Your Cricut blade follows the edges of your vector paths. Thin, wispy lines turn into paths that are too narrow for the blade to cut cleanly — especially on vinyl. Aim for lines at least 2mm thick on paper. Bold is beautiful, and bold actually cuts.
A Full Year of Conversions for $49
Starter Annual: 25 conversions every month, $49 for the whole year. That is about $4.08 a month · Cancel anytime
Get the Annual DealScanning vs. Phone Photos — What Actually Works
You've got your drawing. Now you need to digitize it. You have two realistic options, and both work better than you'd expect.
The Scanner Method
- Scan at 300 DPI minimum (600 DPI if your scanner supports it)
- Use grayscale or black-and-white mode for line art
- Save as PNG — not JPEG, which adds compression artifacts around your lines
- Place paper flat — even a slight wrinkle shows up in scans
The Phone Photo Method
- Shoot in natural light near a window — avoid overhead room lighting that casts hand shadows
- Hold your phone directly above the drawing, parallel to the paper
- Use your phone's built-in document scanner (iPhone Notes, Google Drive) — it auto-corrects perspective and boosts contrast
- Avoid flash — it creates hot spots and uneven lighting
The honest truth? A phone photo in good natural light gets you about 90% of scanner quality. A sensible split is the phone for quick projects and the scanner for designs you plan to sell. For most Cricut crafters, the phone in your pocket is all you need.
The Step-by-Step Workflow: Drawing to Cut File
Here's a simple process to follow every time. Once you do it twice, it becomes second nature.
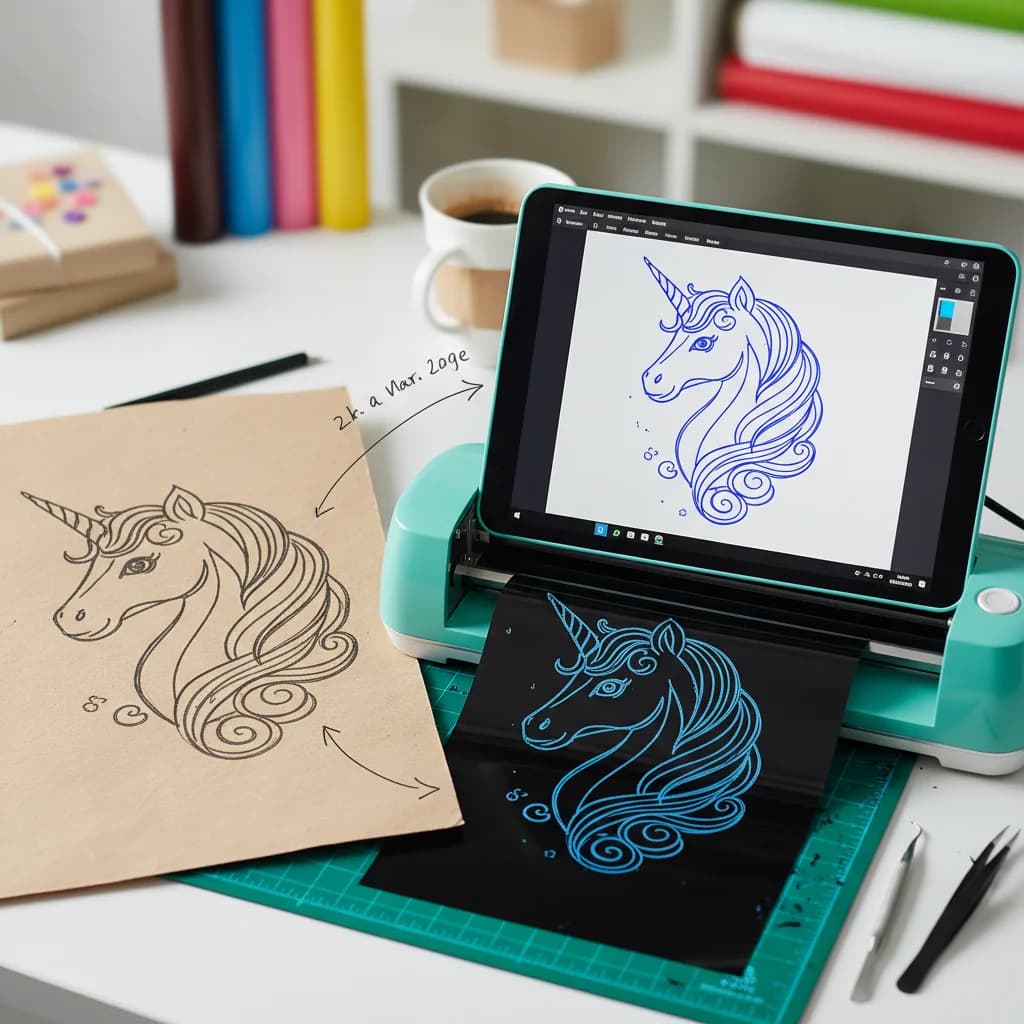
Step 1: Draw Your Design (5-15 minutes)
Grab your Sharpie and white paper. Draw your design larger than you think you need — it's always easier to scale down than up. Don't worry about making it perfect. Embrace the hand-drawn look.
Step 2: Capture It (30 seconds)
Snap a photo with your phone in good light, or scan it. Make sure the entire design is in frame with a bit of white border around it.
Step 3: Convert to SVG with VectoSolve (5 seconds)
- Head to VectoSolve
- Upload your photo or scan
- Click Convert
- Download your clean SVG
VectoSolve's AI smooths your wobbly lines just enough to cut cleanly while keeping the hand-drawn character. It strips away the paper background, removes smudges, and creates proper vector paths — the kind your Cricut actually needs.
Step 4: Clean Up in the SVG Editor (2-5 minutes)
Open your converted file in the VectoSolve SVG Editor for any final tweaks:
- Delete stray marks — that coffee ring or pencil smudge the AI picked up
- Separate elements — split a multi-part design into individual pieces for layered vinyl
- Adjust paths — smooth out any spots that didn't convert perfectly
- Resize and position — get it mat-ready before you even open Design Space
The editor is built for exactly this kind of cleanup work. No learning curve like Illustrator, no crashes like Inkscape on complex files.
Step 5: Import to Cricut Design Space (30 seconds)
- Download the SVG from the editor
- Open Design Space and click Upload then Upload Image
- Select your SVG — it imports as a Cut Image automatically
- Resize, position on your mat, and send to cut
Total time: Under 20 minutes from blank paper to cutting mat. Compare that to hours of manual tracing in Illustrator.
Warning: Watch out for designs that are too detailed for vinyl cutting. Fine crosshatching, tiny dots, intricate stippling, and ultra-thin parallel lines look gorgeous on paper but turn into a nightmare on the cutting mat. Your Cricut blade can only cut so fine — thin lines tear, tiny pieces lift off the backing, and weeding becomes impossible. When in doubt, simplify. Save the detail for print-then-cut projects and keep your cut-only designs bold and clean.
Project Ideas to Get You Started
Once you can turn any drawing into an SVG, the project ideas become endless. Here are some favorites to start with.
Personalized Gifts That Make People Cry (Happy Tears)
- Anniversary mugs with your own hand-lettered date and initials
- Grandparent gifts featuring grandkids' actual drawings on canvas tote bags
- Friendship bracelets with custom hand-drawn charms cut from shrink plastic
- Wedding signs with your own calligraphy — save hundreds on a professional calligrapher
Kids' Art Projects
- Turn your child's drawings into iron-on T-shirts they'll actually want to wear
- Create custom stickers from their artwork — instant lunchbox upgrade
- Make ornaments from their holiday drawings — annual tradition that captures every stage
- Growth art timeline — convert one drawing per year into a vinyl wall display
Pet Portraits & Animal Designs
- Trace a photo of your pet into a simple line drawing, then convert to SVG
- Car decals with your dog's silhouette and name
- Custom pet memorial pieces on wood or glass
- Pet-themed party decorations that actually look like your specific animal
Need a head start? Browse the VectoSolve template library for inspiration — you can customize any template with your own hand-drawn elements.
Key Takeaways
- You don't need to be an artist — imperfect hand-drawn designs have more personality than generic clipart
- Start with a Sharpie and white paper — fancy tools are optional, thick dark lines are not
- Phone photos work great — shoot in natural light directly above your drawing
- Use VectoSolve to convert — AI-powered vectorization handles hand-drawn lines beautifully
- Clean up in the SVG editor — delete stray marks and separate elements for layered cuts
- Draw thick, bold lines — they convert better and cut cleaner on your Cricut
- Simplify for vinyl — save ultra-fine details for print-then-cut projects
- Personalized gifts win every time — a hand-drawn design on a mug beats a store-bought gift any day
Free SVG Tools for Crafters
Design Checker · Color Separator · Mat Preview · Offset Generator · Text to SVG
Check Your SVG FreeStart Making Things Only You Can Make
The best part about hand-drawn Cricut projects isn't the finished product — it's knowing that nobody else on earth has that exact design. Your lines, your style, your personality, pressed into vinyl or cut from cardstock or ironed onto a shirt.
You don't need drawing lessons. You don't need a tablet. You need a Sharpie, a piece of paper, and about sixty seconds on VectoSolve.
Try VectoSolve Free — Preview Your First Conversion, No Signup
| Step | Tool / Method | Tips for Best Results |
|---|---|---|
| 1. Draw Your Design | Black marker on white paper | Use thick lines (2mm+), avoid fine detail |
| 2. Photograph or Scan | Phone camera or flatbed scanner | Even lighting, no shadows, 300+ DPI |
| 3. Convert to Vector | VectoSolve AI or manual trace | Use high-contrast mode, clean up artifacts |
| 4. Clean Up in Design Space | Cricut Design Space / Silhouette Studio | Weld overlapping shapes, remove stray nodes |
| 5. Test Cut | Cricut machine + scrap material | Start with cardstock before vinyl |