
Vector Files for Laser Cutting: Complete Setup Guide
Learn how to prepare vector files for laser cutting and engraving. Covers file formats, line settings, and common mistakes to avoid.
Founder and developer of VectoSolve
Self-taught developer who founded VectoSolve in 2024. He builds the conversion engine and the cutting, embroidery and 3D printing exports, working with the VectoSolve team of graphic designers.
How this article was made: drafted with AI assistance, then edited and fact-checked before publication. About the author
Try it on your own file, in Laser mode
Free preview, no signup. Drop an image and see the vector before deciding anything.
Key Takeaways
- Laser cutters read vector paths, not pixels — clean SVGs with minimal nodes produce the best cuts
- Separate your cut, engrave, and score layers by color before exporting
- Always compensate for kerf (the material the laser burns away) in interlocking designs
- Simplify paths to under 500 nodes per shape for smooth machine motion
- Test every design on cardboard first — the cheapest mistake you'll ever make
Laser users often bring in files that looked perfect on screen and produced garbage on the bed. The problem is almost never the machine. It's the file.
This guide covers every step of preparing vector files for laser cutting — from conversion to a job-ready SVG with proper layers, kerf offsets, and clean node counts.
Why Vector Files Matter
A laser cutter sees coordinates and instructions: move here, fire at this power, trace this path. Raster images (PNG, JPG) only work for engraving — the machine scans back and forth burning pixel by pixel. Slow and imprecise.
Vector files give the laser a continuous toolpath. The head moves smoothly along curves, cutting in a single pass. The edge quality difference is night and day.
Starting from a raster image? Convert to vector first. VectoSolve's AI vectorizer handles this in seconds, producing clean, laser-ready SVGs with optimized node counts.
File Format Comparison
| Format | Laser Support | Strengths | Watch Out For |
|---|---|---|---|
| SVG | Universal | Human-readable, editable | Embedded rasters, CSS styling machines ignore |
| DXF | Universal | CAD standard, precise dimensions | Version compatibility issues |
| AI | Good | Rich editing features | Proprietary, requires Illustrator |
| Good | Preserves layout | May contain mixed raster/vector |
My recommendation: export as SVG whenever possible. Most portable, most inspectable, and virtually every laser software supports it.
Preparing Your Design
Step 1: Get Clean Vectors
The quality of your vector conversion determines everything downstream. Sloppy auto-trace with thousands of unnecessary nodes means your laser will stutter, pause, and produce wobbly cuts.
Use VectoSolve for a clean starting point, then inspect for:
- Smooth curves with minimal anchor points
- Closed paths on every shape you intend to cut
- No overlapping duplicates (the laser cuts the same line twice, charring the edge)
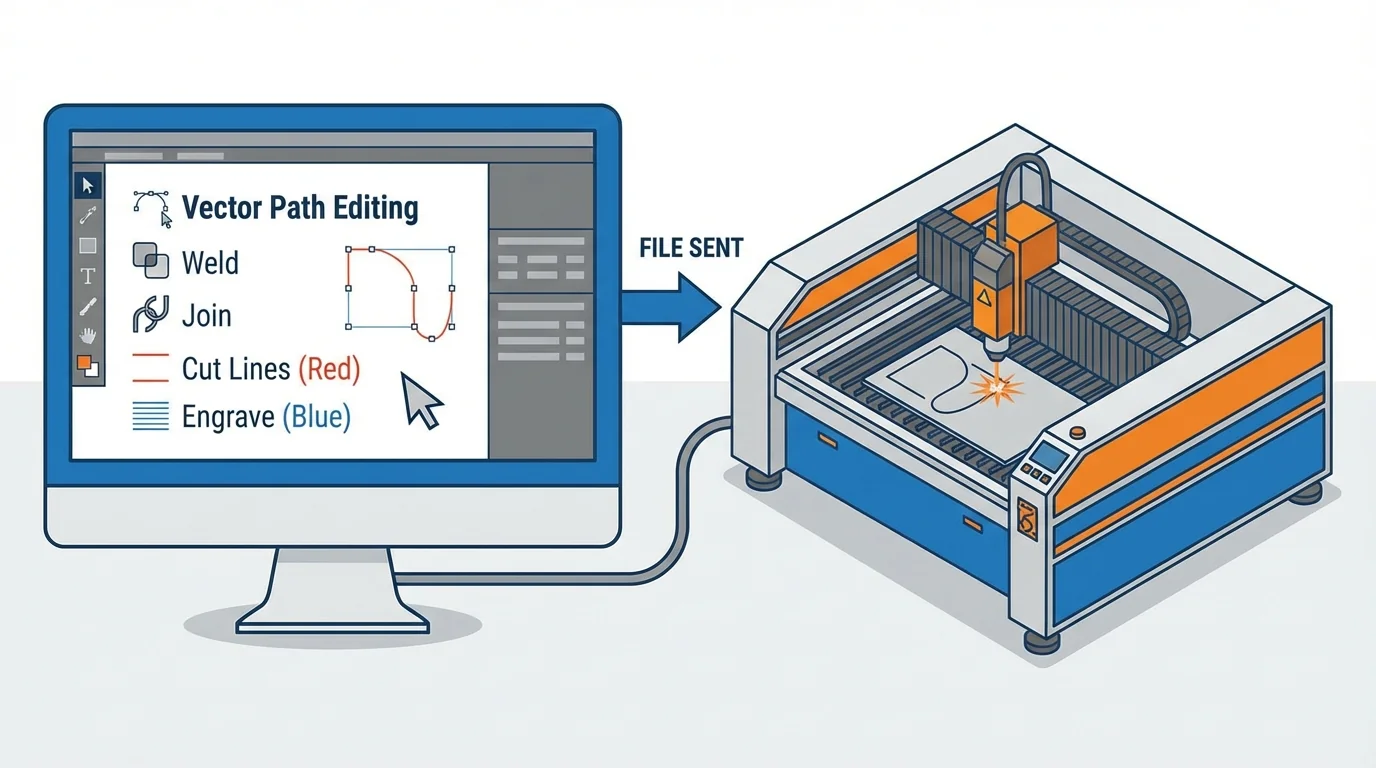
Step 2: Organize Layers by Color
Every laser software uses line color to distinguish operations:
- Red (255,0,0) — Cut lines, all the way through
- Blue (0,0,255) — Engrave/fill regions
- Green (0,255,0) — Score lines, light surface marking
Pro Tip: Set all cut lines to hairline width (0.001" or 0.01mm). Some laser software interprets thick strokes as engrave regions. It is easy to waste an hour because your "cut" lines were 1pt thick.
Step 3: Simplify Paths
The most overlooked step. Your controller's buffer can only process so many coordinates — overloaded paths cause pauses mid-cut (leaving burn marks), jerky motion, and failed jobs.
Target: under 500 nodes per shape. Check in Inkscape via Extensions > Visualize Path > Measure Path.
Step 4: Convert All Text
Never send live text to a laser. Always convert to outlines/paths — the machine doesn't have your fonts.
A Full Year of Conversions for $49
Starter Annual: 25 conversions every month, $49 for the whole year. That is about $4.08 a month · Cancel anytime
Get the Annual DealLaser-Safe vs. Problematic SVG Elements
| SVG Element | Safe? | Notes |
|---|---|---|
<path> | Yes | Gold standard for all cuts |
<line>, <polyline> | Yes | Simple geometry, reliable |
<rect>, <circle> | Yes | Convert to paths for best compatibility |
<text> | No | Must convert to outlines |
<image> | No | Embedded rasters — laser software ignores |
<clipPath> | No | Clipping masks confuse most laser software |
<filter> | No | Blur, shadow have no physical equivalent |
<gradient> | Risky | Some software maps to power variation. Unreliable |
<use> / <symbol> | Risky | Flatten to be safe |
Warning: Common mistake that wastes material: Sending SVGs with embedded <image> tags or unresolved <use> references. Laser software silently drops these elements — you end up with missing pieces. Always preview before cutting.
Kerf Compensation
Kerf is the width of material the laser removes. Typical values:
- 3mm Acrylic: 0.1–0.2mm
- 3mm Plywood: 0.15–0.25mm
- 6mm Plywood: 0.2–0.35mm
- Cardboard: 0.05–0.1mm
For decorative cuts, ignore kerf. For interlocking joints or press-fit assemblies, offset paths by half the kerf width — outward on male tabs, inward on female slots.
"The difference between a box that rattles and one that snaps together with a satisfying click is 0.1mm of kerf compensation. Measure it, don't guess it.
How to measure kerf: Cut a straight line. Measure the gap with digital calipers. Repeat for every new material and lens change.
Material Tips
- Wood/Plywood — Mask with tape to prevent smoke staining. Watch for glue layers that cut inconsistently.
- Acrylic — Leave protective film on. Cast acrylic engraves frosted white; extruded engraves clear.
- Paper/Cardboard — Low power, high speed. Hold flat with magnets.
- Leather — Test on scrap first. Never cut PVC or vinyl — it releases chlorine gas.
Pro workflow: Convert with VectoSolve, clean paths in Inkscape, separate layers by color, simplify nodes, add kerf offsets, export SVG with outlined text. Test on cardboard. Then run final material.
Free SVG Tools for Crafters
Design Checker · Color Separator · Mat Preview · Offset Generator · Text to SVG
Check Your SVG FreePre-Flight Checklist
- All paths closed?
- No duplicate overlapping lines?
- Text converted to outlines?
- Layers colored correctly?
- Node count under 500 per shape?
- Kerf compensation applied for joints?
- Document size matches material?
- No embedded raster images?
- Tested on cardboard?
Laser cutting is a skill where 90% of quality comes from file prep, not machine operation. Start with clean vectors from VectoSolve, organize layers, simplify paths, compensate for kerf, and test on scrap. Your cuts will be cleaner, your waste will drop, and you'll stop tying up the laser troubleshooting bad files.
Now go make something.
| Material | Recommended Power (%) | Speed (mm/s) | Kerf Width (mm) |
|---|---|---|---|
| 3mm Birch Plywood | 80–100 | 10–20 | 0.15–0.20 |
| 3mm Acrylic | 60–80 | 15–25 | 0.10–0.15 |
| Cardstock (300gsm) | 15–25 | 50–80 | 0.05–0.08 |
| 3mm MDF | 85–100 | 8–15 | 0.20–0.25 |
| Leather (2mm veg-tan) | 40–60 | 20–35 | 0.10–0.15 |