Importing SVGs into LightBurn: What Breaks, What the Layers Mean, and How to Prepare Files That Import Clean
LightBurn reads your SVG's colors as cut layers and its paths as toolpaths — nothing else. Here is why imports come in at the wrong size, why text vanishes, and how to prepare a file where every operation lands on its own layer.
Founder of VectoSolve
Self-taught developer, founder and sole developer of VectoSolve since 2024. He builds the conversion engine and the cutting, embroidery and 3D printing exports.
How this article was made: drafted with AI assistance, then edited and fact-checked before publication. About the author
Try it on your own file, in Laser mode
Free preview, no signup. Drop an image and see the vector before deciding anything.
You export an SVG, drag it into LightBurn, and something is wrong. The design comes in at 75% of the size you drew. The text is gone entirely. Or every shape lands on a single black layer and you spend twenty minutes clicking paths apart to separate the cut lines from the engraving. None of these are bugs. They all come from one mismatch: your design tool thinks in appearance, and LightBurn thinks in operations. This guide covers what LightBurn actually reads from an SVG, the failures that account for most bad imports, and how to prepare a file that lands on the right layers the first time.
If your artwork is still a JPG or photo, the JPG to SVG converter produces the clean vector this guide teaches you to import.
How LightBurn Turns Colors into Layers
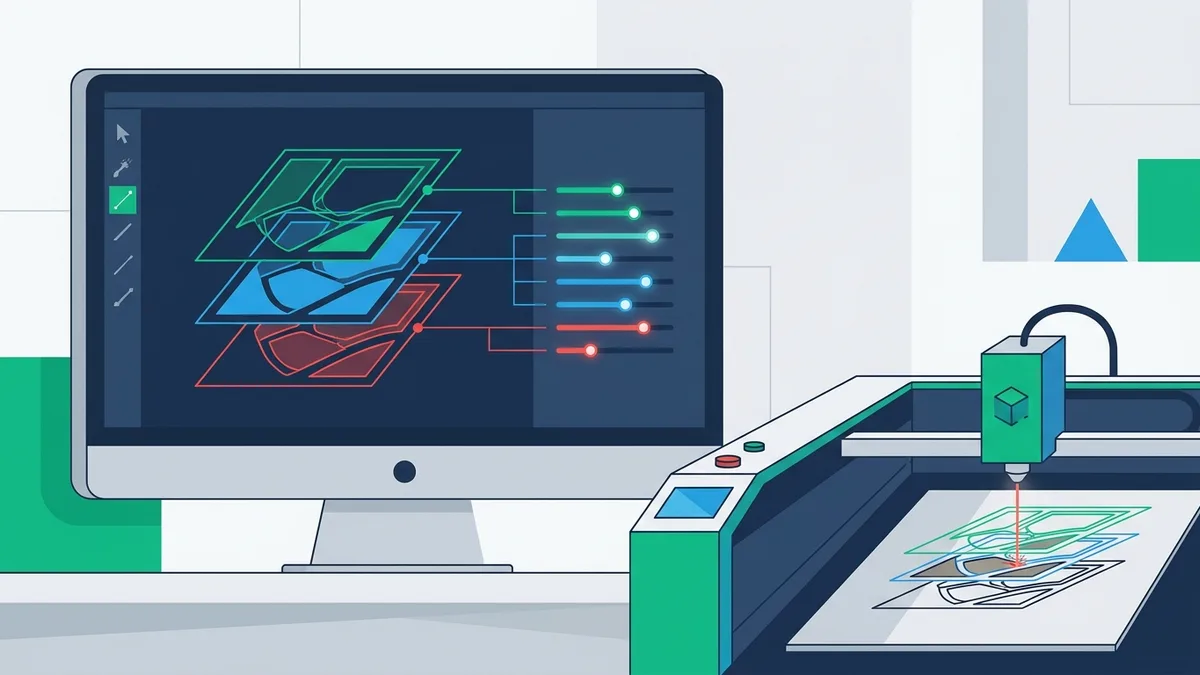
In LightBurn, color is not decoration. Lasers do not print in color, so LightBurn uses the color of each shape to assign it to a layer, and every layer in the Cuts / Layers window carries its own settings: mode, speed, power, and passes. LightBurn's own documentation states the routing rule plainly: "Artwork imported from vector files assigns shapes to layers in LightBurn based on the colors of the vectors in the original file" — and adds that if you create your files with this in mind, it can save you time. That is the entire logic of the system, and it is why a well-prepared SVG imports as a ready-to-run job while a messy one imports as homework.
The palette holds 30 numbered layers (00 through 29) plus two tool layers, T1 (#F36926) and T2 (#0C96D9), which have no cut parameters and are never sent to the laser. Tool layers are for guides, material boundaries, and masking shapes you want on screen but not in the job.
When you import a file, per LightBurn's layer-color reference, the software "will attempt to match the colors used to the default LightBurn color palette," and "using exact matches for the colors used by LightBurn will ensure layers are created correctly." LightBurn even publishes palette files for Inkscape (.gpl), CorelDRAW (.xml), and Illustrator or Affinity Designer (.ase) so you can design in LightBurn's exact colors from the start. The practical consequence cuts the other way too: an auto-traced logo with forty slightly different shades of the same blue will not organize itself into tidy operations. Color reduction is not a cosmetic step. It is how you define the job.
Fill Means Engrave, Line Means Cut — but It Is a Layer Setting
LightBurn assigns vector shapes to layers running in Line mode, Fill mode, or Offset Fill mode. The official definitions are usefully blunt: Line mode "tells your laser to trace a path around the contours of vector graphics" — that is your through-cut or your score, depending on power — and Fill mode "tells your laser to etch parallel lines within the boundaries of vector graphics": that is your engraving. The mode belongs to the layer, not to the shape. With one narrow exception the docs name (an image and a vector sharing a layer, which splits the layer in two), "all graphics that share the same color/layer will be cut or engraved by your laser with the exact same settings." One color per operation is therefore the rule that makes everything else work. Put your engraving shapes on one color and your cut outline on another, and switching the first layer to Fill and the second to Line takes two clicks.
This also explains the single most-asked SVG import question: where did my fills go? A design that renders as solid color in Inkscape arrives in LightBurn looking like a wireframe. LightBurn staff (Oz) settled it on the official forum: "When you import anything into LightBurn, it completely ignores the fill / stroke settings. The only thing it cares about is the colors." And: "In LightBurn, by default, fills aren't shown - only outlines." Nothing was lost — the fill attribute in your SVG was appearance, and appearance was never going to be read. If you want the laser to fill a shape, you set that shape's layer to Fill mode inside LightBurn.
Two geometry details matter more than most tutorials admit.
First, nesting. If two closed shapes sit on the same Fill layer and one is inside the other, LightBurn fills the area between the outlines. That is exactly what you want for lettering: the counter inside an "O" stays empty. But if the outer shape and the inner shape end up on different layers, each fills completely and the counter gets engraved twice. A converted logo where the letter bodies and their counters came out in slightly different colors will do precisely this. Same operation, same color, always.
Second, stroke weight. The laser follows the path centerline; how thick the stroke is drawn on screen is styling, not geometry — the same styling import ignores — so a hairline and a 5 pt stroke produce the same toolpath. The real trap is the opposite habit: expanding or outlining a stroke in your design tool converts one path into two parallel paths. Import that, and your single cut line becomes two cuts a stroke-width apart. If a line is meant to be cut, keep it a stroke, not an outlined shape.
The Most Common Import Failures
| Symptom | Likely cause | Fix |
|---|---|---|
| Status bar says "Nothing Imported" | Live text using fonts not installed on this computer; LightBurn cannot import embedded fonts | Convert all text to paths/outlines before export |
| Design imports at 75% or 133% of true size | SVG DPI mismatch: LightBurn's import setting expects 96 DPI (Inkscape's default) or 72 DPI (Illustrator's default) | Switch the SVG import DPI in Settings, then verify one known dimension |
| Part of the artwork is missing | An embedded bitmap inside the SVG — pixels, not paths | Vectorize the raster portion into real paths before import |
| Gradients or pattern fills come in flat or empty | LightBurn reads shape outlines only; its docs name pattern fills, masking, and gradients as features that do not translate | Flatten effects to solid fills — or export effect-heavy art as a high-DPI image if engraving, not cutting |
| Double cut lines everywhere | Outlined strokes, or stacked shapes and masks from the design tool | Keep strokes as strokes; flatten booleans; use Delete Duplicates |
| Everything on one black layer | All shapes exported in one color, or colors that do not match the palette | One color per operation, ideally exact LightBurn palette values |
Three of these deserve a closer look.
The size problem is pure arithmetic. SVG stores coordinates in units that need a DPI assumption to become millimeters. If your file was written at 72 DPI and LightBurn reads it at 96, every coordinate is divided by a number 33% too large, and a 100 mm design lands at 75 mm (72/96). Read a 96 DPI file at 72 and you get the reverse: 133%. LightBurn exposes this as a simple import preference — its settings page offers "96 DPI — the default for Inkscape" or "72 DPI — the default for Adobe Illustrator" — and the documentation says exactly what to do: "If your SVGs import at the incorrect scale, try the alternate setting to the one you currently have selected." The habit that saves material: put a known dimension in the design — the outer cut boundary works — and measure it after import, every time.
The text problem is the most common total failure. LightBurn's file-management documentation is direct about it: "make sure that any fonts used in the file are installed on your computer, or that the text has been converted to paths using whatever tools are available in the other program. LightBurn is not able to import embedded fonts." If neither is true, you get "Nothing Imported" in the status bar. Converting text to outlines before export costs nothing and removes the dependency entirely — the file cuts identically on any computer.
The embedded-raster problem is a format fact, not a software fault. An SVG can legally contain a bitmap image inside it, and many export pipelines embed the original photo for reference. But a bitmap has no path data: there is no outline for a Line-mode layer to follow and no boundary for Fill mode to respect. If your goal is cutting or clean vector engraving, that raster must be traced into paths before it enters LightBurn. And if what you actually want is photo engraving, that is a genuinely different workflow with different file preparation — we compare the two in photo vs vector laser engraving.
There is one more failure mode worth naming: extra shapes you never drew, and effects that never arrive. LightBurn's usage documentation is explicit that "Not all features of every format will be supported. Vector graphics formats in particular are incredibly complex, and using more advanced features, like pattern fills, masking, gradients, and so on will not necessarily translate well when importing." Artwork built by stacking shapes and hiding parts behind masks looks fine in a design app but can import with the hidden geometry exposed, because LightBurn works with every path in the file. The docs' own workaround for effect-heavy artwork is "exporting as a high-DPI image" — sensible when the piece is a photo-style engraving, wrong when you need cuttable paths. For cut work, the fix is upstream: flatten the stack with boolean operations and reduce fills to solid colors so the file contains only the geometry you intend to burn.
A newer warning worth taking seriously: LightBurn's import documentation now cautions against AI-generated files, because "the files generated may not conform to standards for the file type you're importing and you may experience failed imports or unexpected results." If an AI tool wrote your SVG, treat it as unverified input — open it in a real editor, or run it through a converter that emits standards-compliant output, before trusting it with material.
A Full Year of Conversions for $49
Starter Annual: 25 conversions every month, $49 for the whole year. That is about $4.08 a month · Cancel anytime
Get the Annual DealPreparing a Converted Logo So Layers Land Right
Suppose you are starting from a customer's PNG logo. The preparation sequence that produces a clean import looks like this:
- Decide the operations first. A typical job has two or three: engrave the filled artwork, score fine detail, cut the outer boundary.
- Vectorize with color discipline. Each operation gets exactly one color. Our laser cut file converter is built for this step: it has laser-specific presets, merges near-duplicate shades instead of tracing forty of them, and welds same-color shapes together, so each operation arrives in LightBurn as one selectable, recolorable unit — with a DXF export that can split cut and engrave layers if your workflow wants them named. To be clear about what it does not do: it will not choose your power and speed — those depend on your machine and material and belong in LightBurn — and it cannot invent detail that a blurry source image never had. You get one watermarked preview a day without signing up; clean conversions run 0.20 credits each, with plans from $7.99 a month for 25 conversions.
- Convert any remaining text to paths and export.
- Import, measure your known dimension, assign modes. Fill for the artwork layer, Line for the cut layer, and set each layer's numbers.
If an SVG from some upstream tool keeps fighting you — transforms that shift geometry, style attributes that scatter shapes across layers — it is sometimes faster to strip the styling entirely. Our SVG to DXF converter outputs bare geometry by default — a single layer, nothing but the paths themselves — with an optional CUT/ENGRAVE layer preset for LightBurn if you still want an automatic cut/engrave split. For CAD-adjacent work, or files that refuse to scale correctly as SVG, DXF is often the cleaner import path.
Verify Closed Paths Before You Cut
An open path fails differently depending on mode. Fill mode has a hard geometric requirement, stated in a callout LightBurn's documentation labels "Closed Shapes Only": "This feature only works with shapes that are closed. A shape is closed when it is a complete, continuous loop whose start and end points are the same." A shape that is not closed has no unambiguous inside, so the fill misbehaves or disappears. In Line mode, a cut boundary with a 0.1 mm gap traces almost the entire perimeter and then leaves the part attached to the sheet — you find out after the material is spent. These gaps are usually invisible at working zoom: at a typical screen scale showing a 300 mm bed, a 0.1 mm gap is a fraction of a pixel.
Run the file through our cut file checker before committing material. It is free and scores the file for gaps and open paths so you know where to look. It flags problems; it does not judge intent — an open path might be a deliberate score line, and only you know that. Close genuine gaps in your design tool or in LightBurn's node editing, then re-check.
Dial In Each Layer with a Test Grid, Not Folklore
Every layer you created still needs real numbers, and settings copied from a forum post were tuned for someone else's tube, lens, and plywood batch. Our material test card generator builds a labelled power/speed grid for LightBurn, free. Each cell is its own color, so it lands on its own layer; set each layer to the power and speed engraved under its square, burn the card once per new material on scrap, keep it, and read your Line and Fill settings straight off it. The generator gives you the file; the ten minutes on your own machine is what actually produces knowledge.
Free SVG Tools for Crafters
Design Checker · Color Separator · Mat Preview · Offset Generator · Text to SVG
Check Your SVG FreeFAQ
Why does my SVG import into LightBurn at the wrong size?
Because SVG coordinates need a DPI assumption, and LightBurn's import setting has to match the program that wrote the file: 96 DPI is Inkscape's default, 72 DPI is Illustrator's. The wrong pairing scales everything by 75% or 133%. Switch the SVG import DPI in LightBurn's settings — the documentation itself says to try the alternate setting if the scale is wrong — and confirm by measuring a dimension you know.
Why do my SVG fills disappear in LightBurn?
They do not disappear; they were never read. As LightBurn staff explained on the official forum, import "completely ignores the fill / stroke settings" and only reads colors, and LightBurn's canvas shows outlines by default. Set the shape's layer to Fill mode and the laser will fill it.
Why does LightBurn say "Nothing Imported"?
Almost always live text. LightBurn's documentation states it "is not able to import embedded fonts," so text either needs its font installed on your computer or, far better, needs to be converted to paths before export. Outlined text imports identically everywhere.
Do I need hairline strokes to make LightBurn cut a line?
No. Some printer-driver laser workflows use hairline stroke widths to signal a cut, but LightBurn decides cut versus engrave by the layer's mode, and the toolpath follows the path regardless of stroke weight. What you should avoid is outlining strokes into filled shapes, which turns one cut line into two parallel ones.
Should I send LightBurn an SVG or a DXF?
LightBurn imports both — its file-management documentation lists .ai, .svg, .dxf, .pdf, and .plt/.hpgl as importable vector formats. SVG preserves color, which is what drives automatic layer assignment, so a properly color-separated SVG is usually the better import. Reach for DXF when an SVG's styling or transforms keep causing trouble and you would rather assign layers by hand from clean, bare geometry.
Sources
- LightBurn Documentation — File Management — the official list of importable formats (.ai, .svg, .dxf, .pdf, .plt/.hpgl plus .png, .jpg, .bmp, .gif, .tif), the embedded-fonts limitation, and the caution on AI-generated files.
- LightBurn Documentation — Basic Usage: The Essentials — color-based layer assignment on import, and the warning that pattern fills, masking, and gradients do not translate well (with the high-DPI image workaround).
- LightBurn Documentation — Layer Colors — the palette table: 30 layer colors (00–29) plus tool layers T1 (#F36926) and T2 (#0C96D9), the exact-color-match recommendation, and downloadable palette files. Marked as legacy documentation (LightBurn 1.6 and earlier) but still the canonical palette values.
- LightBurn Documentation — Colors and Layers — the Line and Fill mode definitions and the same-color-same-settings rule.
- LightBurn Documentation — Fill Mode (Cut Settings Editor) — the "Closed Shapes Only" requirement for Fill mode.
- LightBurn Documentation — Settings / Preferences — the 96 DPI (Inkscape) vs 72 DPI (Illustrator) SVG import setting and the incorrect-scale fix.
- LightBurn Software Forum — "Missing Fill from SVG" — LightBurn staff (Oz) confirming that import ignores fill/stroke styling entirely and reads only colors, and that fills are not shown by default.