
How to Vectorize Images for Cricut & Silhouette (SVG Cutting Files)
Create perfect SVG cut files for your Cricut or Silhouette machine. Learn how to convert any image into a cuttable vector design.
Founder and developer of VectoSolve
Self-taught developer who founded VectoSolve in 2024. He builds the conversion engine and the cutting, embroidery and 3D printing exports, working with the VectoSolve team of graphic designers.
How this article was made: drafted with AI assistance, then edited and fact-checked before publication. About the author
Try it on your own file, in Cricut mode
Free preview, no signup. Drop an image and see the vector before deciding anything.
Key Takeaways
- Cricut and Silhouette machines require vector SVG files to produce clean, accurate cuts -- raster images (PNG/JPG) won't work directly
- Vectosolve's AI vectorizer converts photos, hand-drawn art, and logos into cut-ready SVGs in seconds
- Proper node cleanup and path simplification prevent jagged edges and blown-out small details
- Always run a test cut on scrap material before committing your good vinyl or cardstock
- Design with a minimum stroke width of 1.5mm and avoid interior details smaller than 3mm for reliable cutting
Making a gift this week? See how to turn a photo of Dad into a Cricut gift in 10 minutes before Father's Day.
Why Cutting Machines Need Vector SVG Files
If you've ever tried to load a PNG or JPEG into Cricut Design Space or Silhouette Studio, you've probably noticed the results are... disappointing. The machine either refuses the file, traces it poorly, or produces cuts with rough, stair-stepped edges that look nothing like your original design.
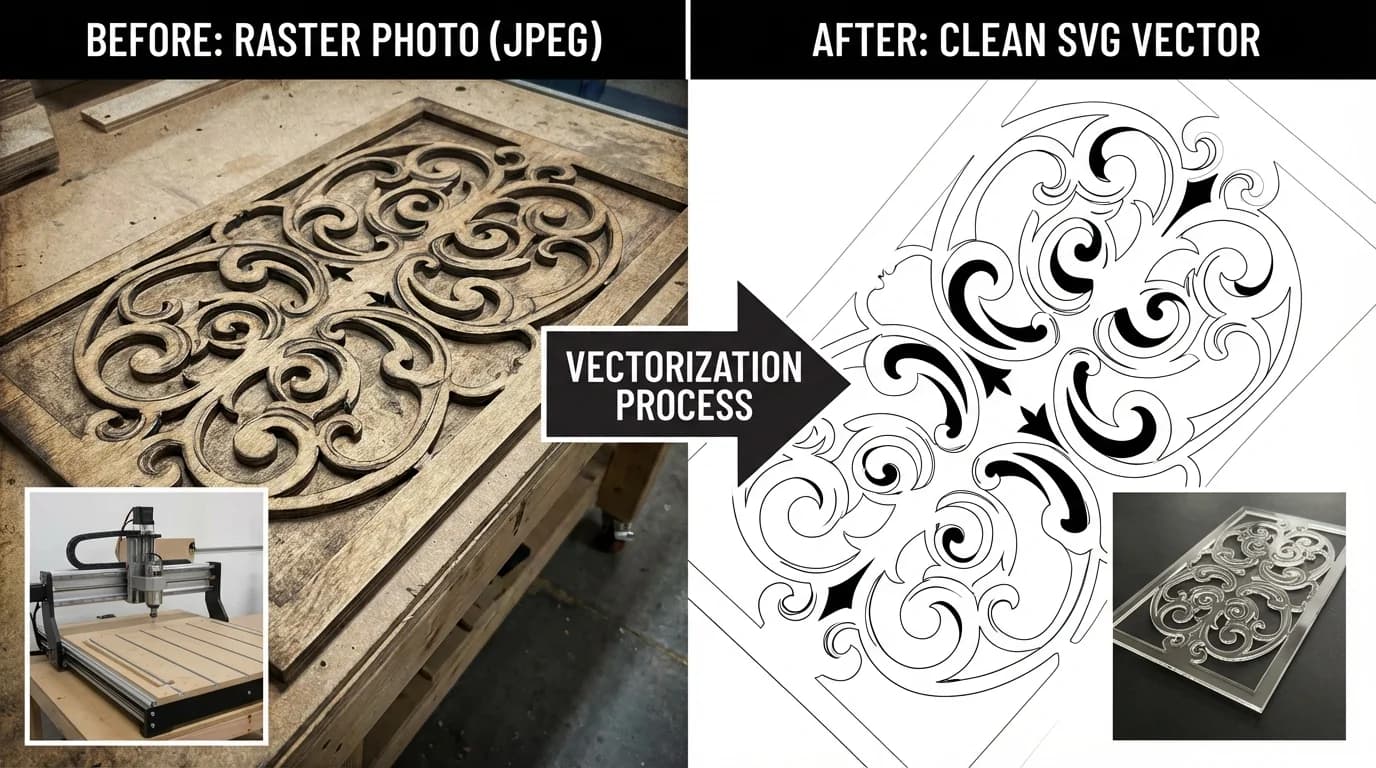
The reason is simple: cutting machines don't understand pixels. They understand paths -- mathematical curves that tell the blade exactly where to travel. That's what an SVG (Scalable Vector Graphic) file provides: a set of precise coordinates and curves that the machine follows like a map.
Here's what happens under the hood:
- Raster images (PNG, JPG, BMP) store color data as a grid of pixels. When you zoom in, you see squares. The cutting machine has no idea where the "edges" of your design actually are.
- Vector images (SVG, EPS, AI) store shapes as mathematical paths with anchor points and curves. The machine reads these paths and sends them directly to the blade.
Step-by-Step: From Image to Cut-Ready SVG
Whether you're working with a photograph, a hand-drawn sketch, or a logo downloaded from the internet, the workflow follows the same general pattern. Here is the workflow step by step.
Step 1: Prepare Your Source Image
Garbage in, garbage out. The cleaner your starting image, the better your SVG will be.
Pro Tip: For hand-drawn designs, photograph or scan your art on a white background with even lighting. Use your phone's document scanning mode -- it automatically increases contrast and removes shadows.
Best practices for source images:
- Use the highest resolution available (at least 300 DPI for scans)
- Ensure strong contrast between your design and the background
- Remove any background clutter or stray marks
- If your design has color, make sure the colors are distinct and not muddy
- For logos, track down the largest version you can find
Step 2: Upload to Vectosolve's AI Vectorizer
Head to Vectosolve and upload your image. The AI engine analyzes the pixel data and generates clean vector paths automatically.
Recommended settings for cutting files:
- Detail level: Medium to Low. High detail creates too many nodes for cutting machines to handle smoothly.
- Color mode: For single-color vinyl cuts, use monochrome. For layered designs, let the AI separate colors.
- Path simplification: Enable this. It reduces the number of anchor points while preserving shape accuracy, which is critical for smooth cuts.
Step 3: Clean Up the Vector Output
Even the best vectorizer sometimes generates paths you don't need. Before exporting:
- Delete stray nodes and tiny artifact paths (anything smaller than 1mm is probably noise)
- Combine overlapping shapes where possible to reduce cut complexity
- Check for open paths -- cutting machines need closed paths to know where to start and stop
- Verify path direction -- outer paths should go clockwise, inner paths (cutouts) counterclockwise
Step 4: Export as SVG
Download your cleaned-up file as an SVG. Make sure the export settings use absolute coordinates rather than relative, and that the viewBox is set correctly for your intended cut size.
Some vectorizers export SVGs with embedded raster data as a fallback. Always check that your SVG contains actual <path> elements, not just an embedded PNG wrapped in SVG tags. Open the file in a text editor and look for d="M..." path data.
Importing SVGs into Cricut Design Space
Cricut Design Space is the most popular cutting software, and it handles SVGs well -- once you know the quirks.
Upload Process
- Open Cricut Design Space and click "Upload" in the left panel
- Click "Upload Image" and select your SVG file
- Design Space will show a preview. Check that all paths are visible and nothing is missing
- Choose the image type:
- Cut Image -- for vinyl, cardstock, and other materials you want to cut
- Print Then Cut -- for stickers or designs where you print first, then cut the outline
- Name your upload and click "Save"
- Find your image in the "Recently Uploaded" section and click "Insert" to add it to your canvas
Cricut-Specific Tips
- Resize on the canvas, not before upload. Design Space preserves vector quality at any size.
- If your design has multiple colors/layers, Design Space will automatically separate them onto different layers. Check the Layers panel to verify the separation is correct.
- Use "Attach" to keep multi-piece designs positioned correctly relative to each other on the mat.
- Use "Weld" to merge overlapping shapes into a single cut path -- essential for connected script lettering.
- "Flatten" converts a multi-layer design into a single Print Then Cut layer.
Warning: Cricut Design Space has a maximum upload size of 400 KB for SVG files. If your file is larger, go back and simplify your paths further. Reducing the number of anchor points almost always fixes this.
A Full Year of Conversions for $49
Starter Annual: 25 conversions every month, $49 for the whole year. That is about $4.08 a month · Cancel anytime
Get the Annual DealImporting SVGs into Silhouette Studio
Silhouette Studio handles SVGs slightly differently depending on which edition you have.
Edition Requirements
- Basic Edition (free): Does NOT support SVG import. You'll need to use DXF files instead, or upgrade.
- Designer Edition (paid upgrade, $49.99 as listed in February 2026): Adds SVG import support. This is the minimum you need.
- Designer Edition Plus / Business Edition: Full SVG support plus additional features.
Upload Process (Designer Edition+)
- Open Silhouette Studio and go to File > Open (or File > Import for some versions)
- Navigate to your SVG file and select it
- The design will appear on your virtual cutting mat
- Use the Scale tool to resize to your desired dimensions
- Open the Send panel (the small blade icon) to configure cut settings
Silhouette-Specific Tips
- If your SVG imports as a grouped object, right-click and "Ungroup" to access individual paths
- Use the Offset tool to add a border or margin around your design for easier weeding
- For print-and-cut, add registration marks via the Page Setup panel
- The Trace function in Silhouette Studio is decent for simple shapes, but for complex designs you'll get far better results vectorizing externally with Vectosolve first
Material Settings Reference
Getting your material settings right is just as important as having a good SVG. Here's a starting-point reference table for both Cricut and Silhouette machines.
| Material | Cricut Blade | Cricut Pressure | Silhouette Blade | Silhouette Speed | Notes |
|---|---|---|---|---|---|
| Adhesive Vinyl (Oracal 651) | Fine-Point | Default / Medium | Blade: 1-2 | Speed: 5 | Don't cut through the backing paper |
| Heat Transfer Vinyl (HTV) | Fine-Point | Default / Iron-On | Blade: 2 | Speed: 4 | Mirror your design before cutting! |
| Cardstock (65 lb) | Fine-Point | Cardstock setting | Blade: 3 | Speed: 3 | Use a light grip mat to prevent tearing |
| Cardstock (110 lb / Heavy) | Deep-Point | Heavy Cardstock | Blade: 5-6 | Speed: 2 | May need double cut for clean edges |
| Sticker Paper | Fine-Point | Light Cardstock | Blade: 2 | Speed: 4 | Adjust based on sticker paper thickness |
| Faux Leather | Deep-Point | Custom / High | Blade: 7-8 | Speed: 1 | Use strong grip mat; test first |
| Glitter Cardstock | Fine-Point | Glitter Cardstock | Blade: 3-4 | Speed: 3 | Glitter dulls blades faster -- use a fresh blade |
| Acetate / Transparency | Fine-Point | Light / Custom | Blade: 1 | Speed: 5 | Tape down edges to prevent shifting |
Pro Tip: These are starting points, not gospel. Every machine has slight variations, and environmental factors like humidity affect materials. Always do a test cut with your specific machine and material combination before cutting your full design.
Troubleshooting Common Cutting Problems
Even with a perfect SVG file, cutting issues happen. Here are the most common problems and how to fix them.
Problem: Machine Not Cutting Through the Material
Symptoms: The blade scores the material but doesn't cut all the way through. Pieces tear when you try to weed them.
Solutions:
- Increase pressure by one or two increments in your software settings
- Run a double cut -- most machines have this option in the send/cut dialog
- Check your blade depth. Silhouette users: manually adjust the ratchet blade. Cricut users: make sure you're using the correct blade type for your material.
- Replace your blade. A dull blade is the #1 cause of incomplete cuts. If you've done more than 5-6 projects, the blade may be worn.
- Check your cutting mat. If the mat has lost its grip, the material shifts during cutting, causing uneven depth.
Problem: Jagged or Rough Edges on Cuts
Symptoms: The cut lines look serrated or wavy instead of smooth and clean.
Solutions:
- Reduce the number of nodes in your SVG. This is the most common cause. Too many anchor points create micro-direction changes that the blade can't follow smoothly. Re-vectorize with lower detail settings.
- Slow down the cut speed. Faster isn't always better. Reducing speed by 2-3 increments gives the blade time to follow curves accurately.
- Check for blade wobble. Remove the blade housing and inspect the blade tip. If it wobbles, the housing needs replacing.
- Use a fresh mat with good adhesion so the material doesn't shift.
Problem: Small Details Not Cutting Properly
Symptoms: Tiny elements of your design (thin lines, small text, intricate patterns) tear, don't cut, or get pulled up by the blade.
Solutions:
- Redesign for the medium. Cutting machines have physical limits. As a rule of thumb:
- Minimum line width: 1.5mm (about 4pt)
- Minimum interior detail: 3mm x 3mm
- Minimum font size: 0.5 inches / 12mm for most fonts (larger for script fonts)
- Weed in reverse. Instead of pulling up the waste material, peel the backing away from the design at a sharp angle.
- Use transfer tape to lift delicate cut pieces without distortion.
- Switch to a Kiss Cut for stickers instead of a full cut -- this preserves small details by not cutting through the backing.
Warning: If your design has details under 2mm, consider whether cutting is the right approach. For ultra-fine detail work, Print Then Cut often gives better results because the printer handles the detail and the blade only cuts the simple outer outline.
Free SVG Tools for Crafters
Design Checker · Color Separator · Mat Preview · Offset Generator · Text to SVG
Check Your SVG FreeDesign Tips for Cuttable SVG Files
Knowing what makes a good cut file will save you hours of frustration and wasted material.
Keep It Simple (Seriously)
What looks amazing on screen doesn't always translate to a physical cut. Simplify aggressively:
- Convert thin lines to thicker shapes
- Remove interior details that are too small to weed
- Combine nearby elements into single shapes where possible
- Avoid sharp corners under 30 degrees -- they're fragile and prone to tearing
Design for Weeding
Weeding (removing the waste material around your design) is often harder than the cutting itself. Design with weeding in mind:
- Leave adequate spacing between cut lines (at least 2mm)
- Avoid long, thin strips of waste material -- they're hard to peel
- For text designs, consider whether individual letters or a connected script will be easier to weed
- Add a weeding box (a rectangle around your entire design) for easier handling
Layer Planning for Multi-Color Designs
If your design uses multiple vinyl colors:
- Separate each color onto its own layer in your vector editor before exporting
- Design slight overlaps (1-2mm) between adjacent colors so there are no gaps when layered
- Plan your layering order -- always apply lighter colors first, darker colors on top
- Use registration marks or alignment guides to ensure accurate layer positioning
File Organization
- Name your SVG files descriptively:
butterfly-3color-8inch.svgbeatsdesign_final_v2.svg - Keep a folder structure:
/Cut Files/[Project Name]/with subfolders for each color layer if needed - Save your original high-res source image alongside the SVG so you can re-vectorize if needed
From Screen to Cutting Mat: An Example Project
Here is how a typical project goes: converting a hand-drawn floral wreath into a multi-layer vinyl decal.
The Source
Start with a pencil sketch on white paper, photographed with a phone in document scanning mode. A photo like this is usually clean but has some gray pencil shading and a slightly warm paper tone.
The Vectorization
- Upload to Vectosolve with monochrome mode and medium detail
- The AI separates the floral outlines from the background
- Simplify the paths to cut the node count without visible quality loss
- Export as SVG and check the file stays well under Cricut's 400 KB limit
The Cut
- Import into Cricut Design Space
- Resize to 6 inches diameter
- Cut on Oracal 651 permanent vinyl in rose gold
- Settings: Fine-Point blade, default vinyl pressure
- Weed, then apply with transfer tape, for example to a ceramic mug
On a project like this, most of the time goes into weeding.
Wrapping Up
Converting images to cut-ready SVGs doesn't have to be a struggle. The key is starting with a proper vectorization tool that gives you clean paths with manageable node counts, then following the material-specific settings for your machine.
Here's your quick-reference checklist before every cut:
- Source image is high-contrast and high-resolution
- SVG has clean, closed paths with simplified nodes
- No details smaller than 3mm in the design
- Correct blade and pressure settings for your material
- Test cut completed on scrap material
- Design is mirrored (for HTV/iron-on only)
- Fresh blade installed if the last one has done 5+ projects
Whether you're making custom t-shirts, laptop stickers, wedding decorations, or Etsy shop inventory, a reliable vectorization workflow is the foundation of every great cut project. Give Vectosolve's AI vectorizer a try with your next design -- you might be surprised how much time you save compared to manual tracing or built-in machine software.
| Material | Max Blade Detail | SVG Node Limit | Recommended Blade |
|---|---|---|---|
| Adhesive vinyl (permanent) | 0.25 inch features | Under 1,500 nodes | Fine-point blade |
| Heat transfer vinyl (HTV) | 0.4 inch features | Under 1,000 nodes | Fine-point blade |
| Cardstock (65 lb) | 0.125 inch features | Under 2,000 nodes | Fine-point blade |
| Iron-on (glitter) | 0.5 inch features | Under 800 nodes | Fine-point blade |
| Sticker paper | 0.2 inch features | Under 1,500 nodes | Fine-point blade |